How to Use UPE
先决条件
请先根据 README 来完成基本配置。
配置方法
注册 Leancloud
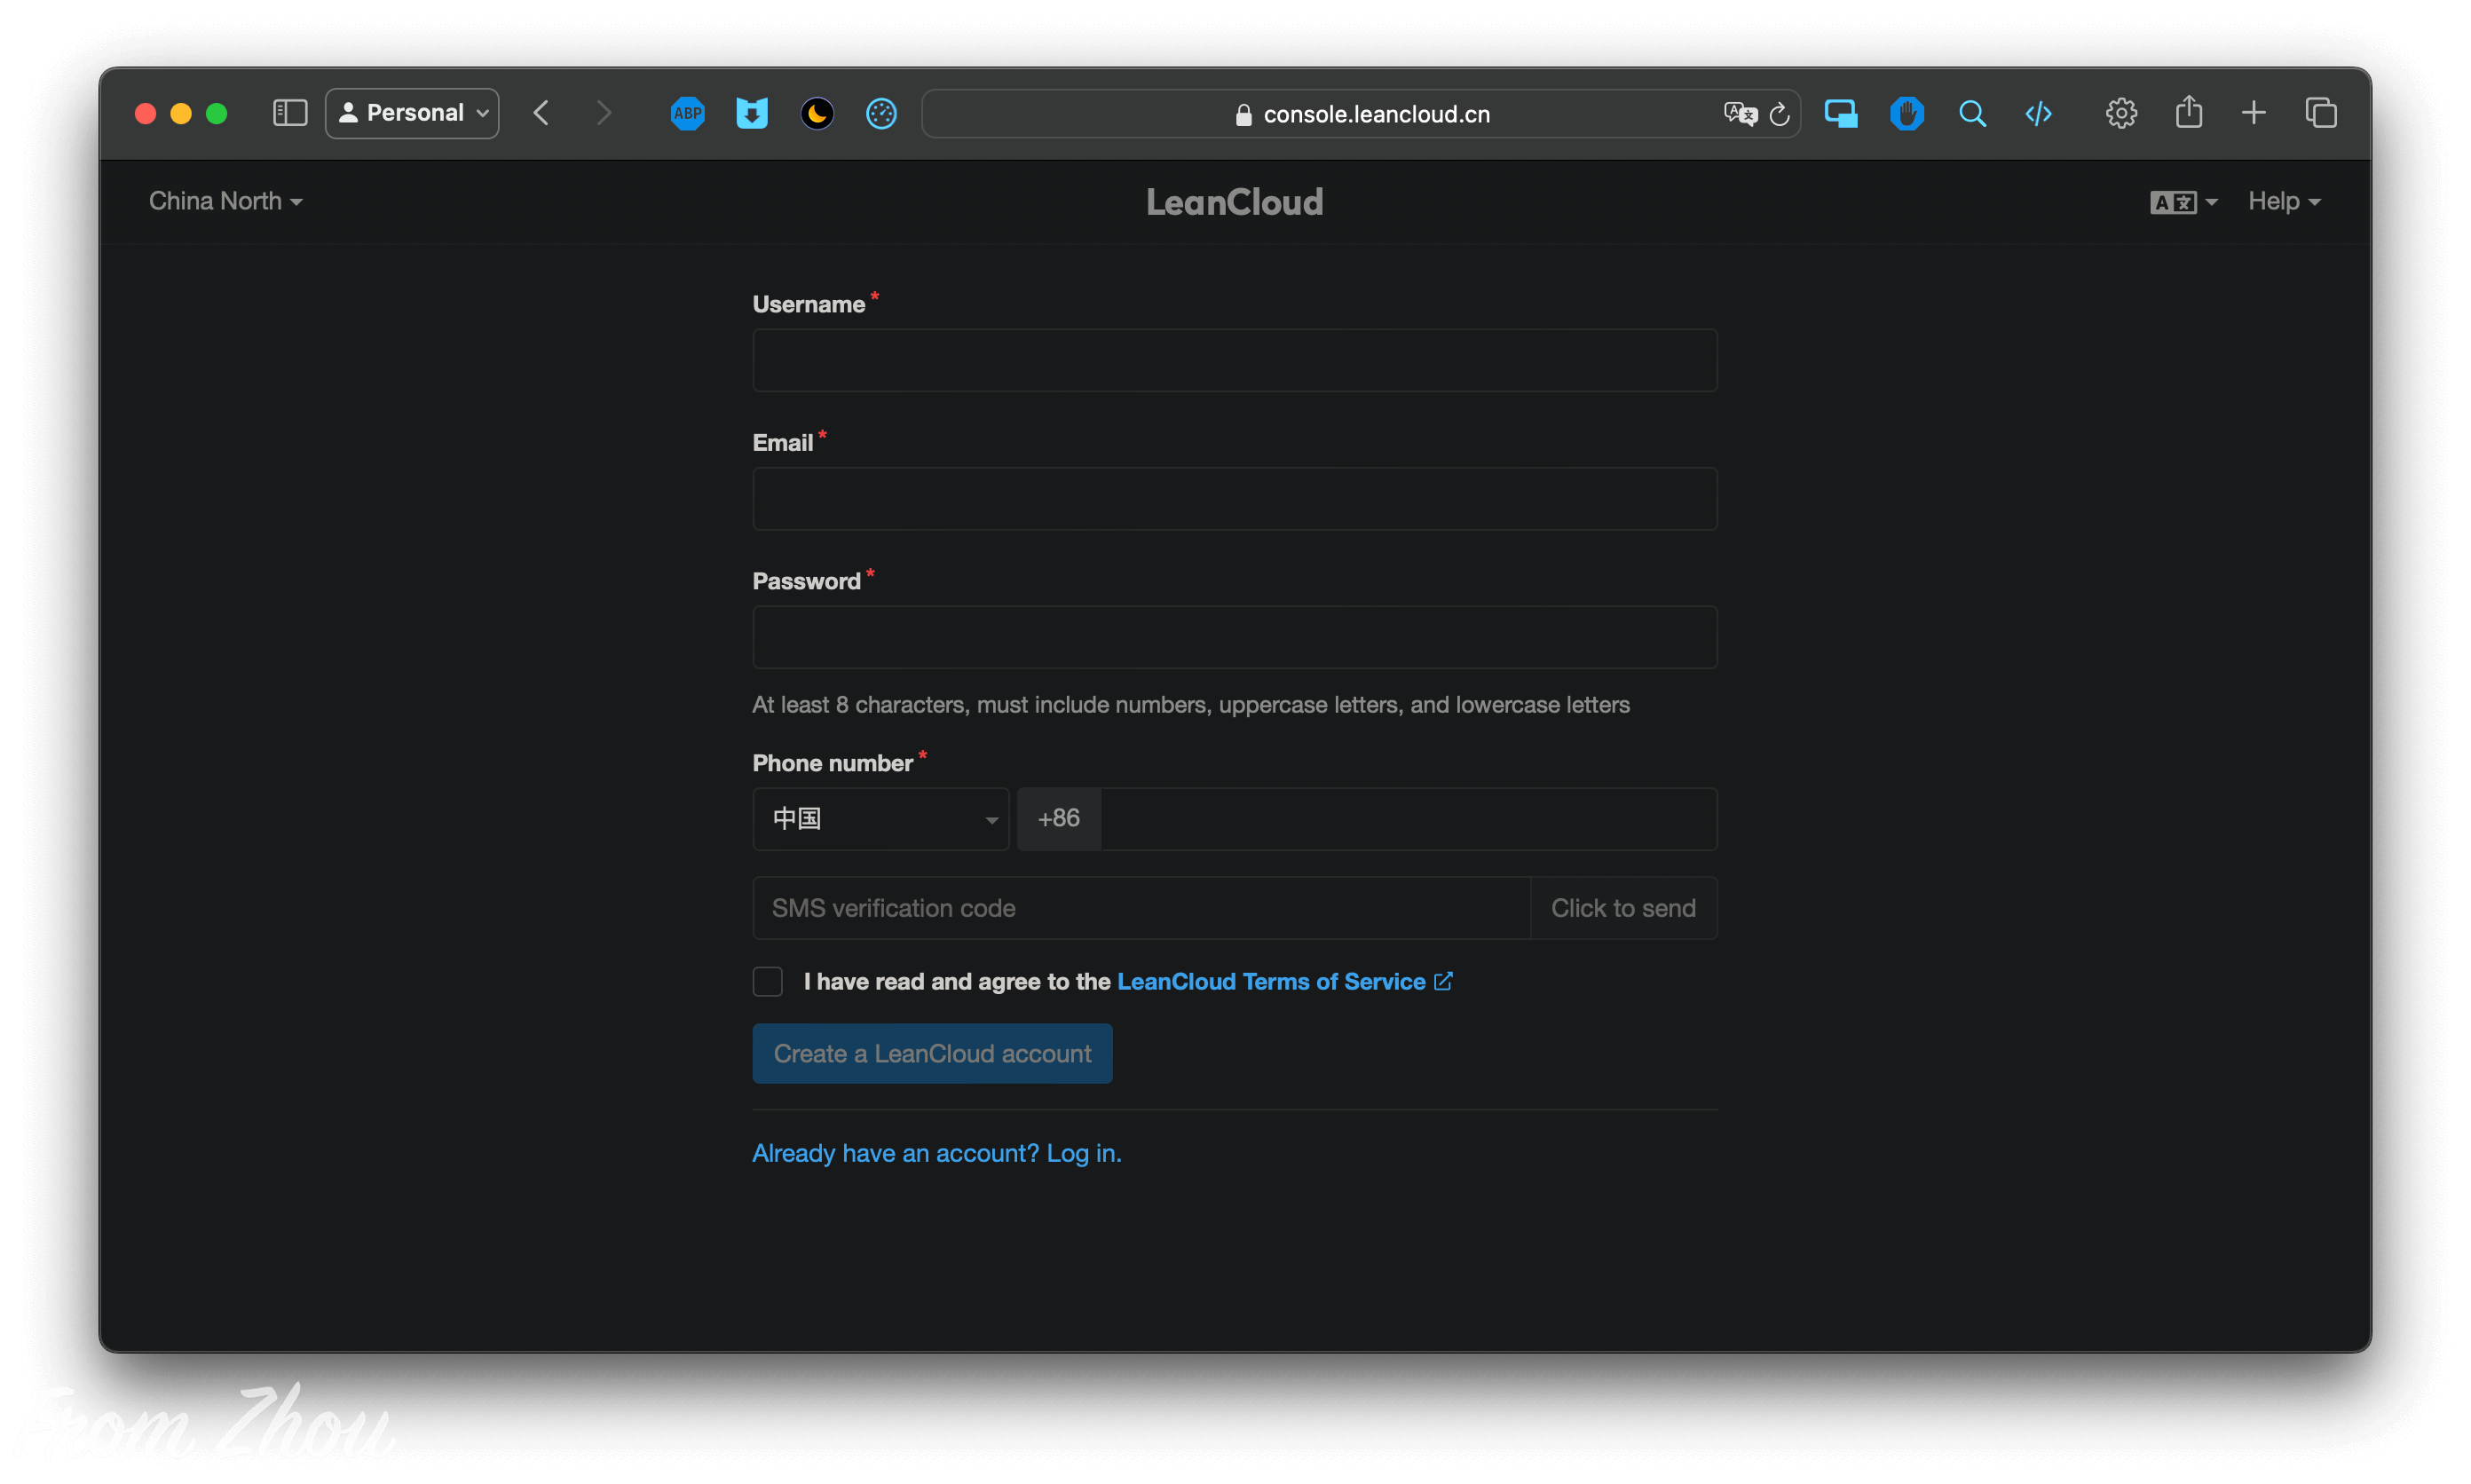
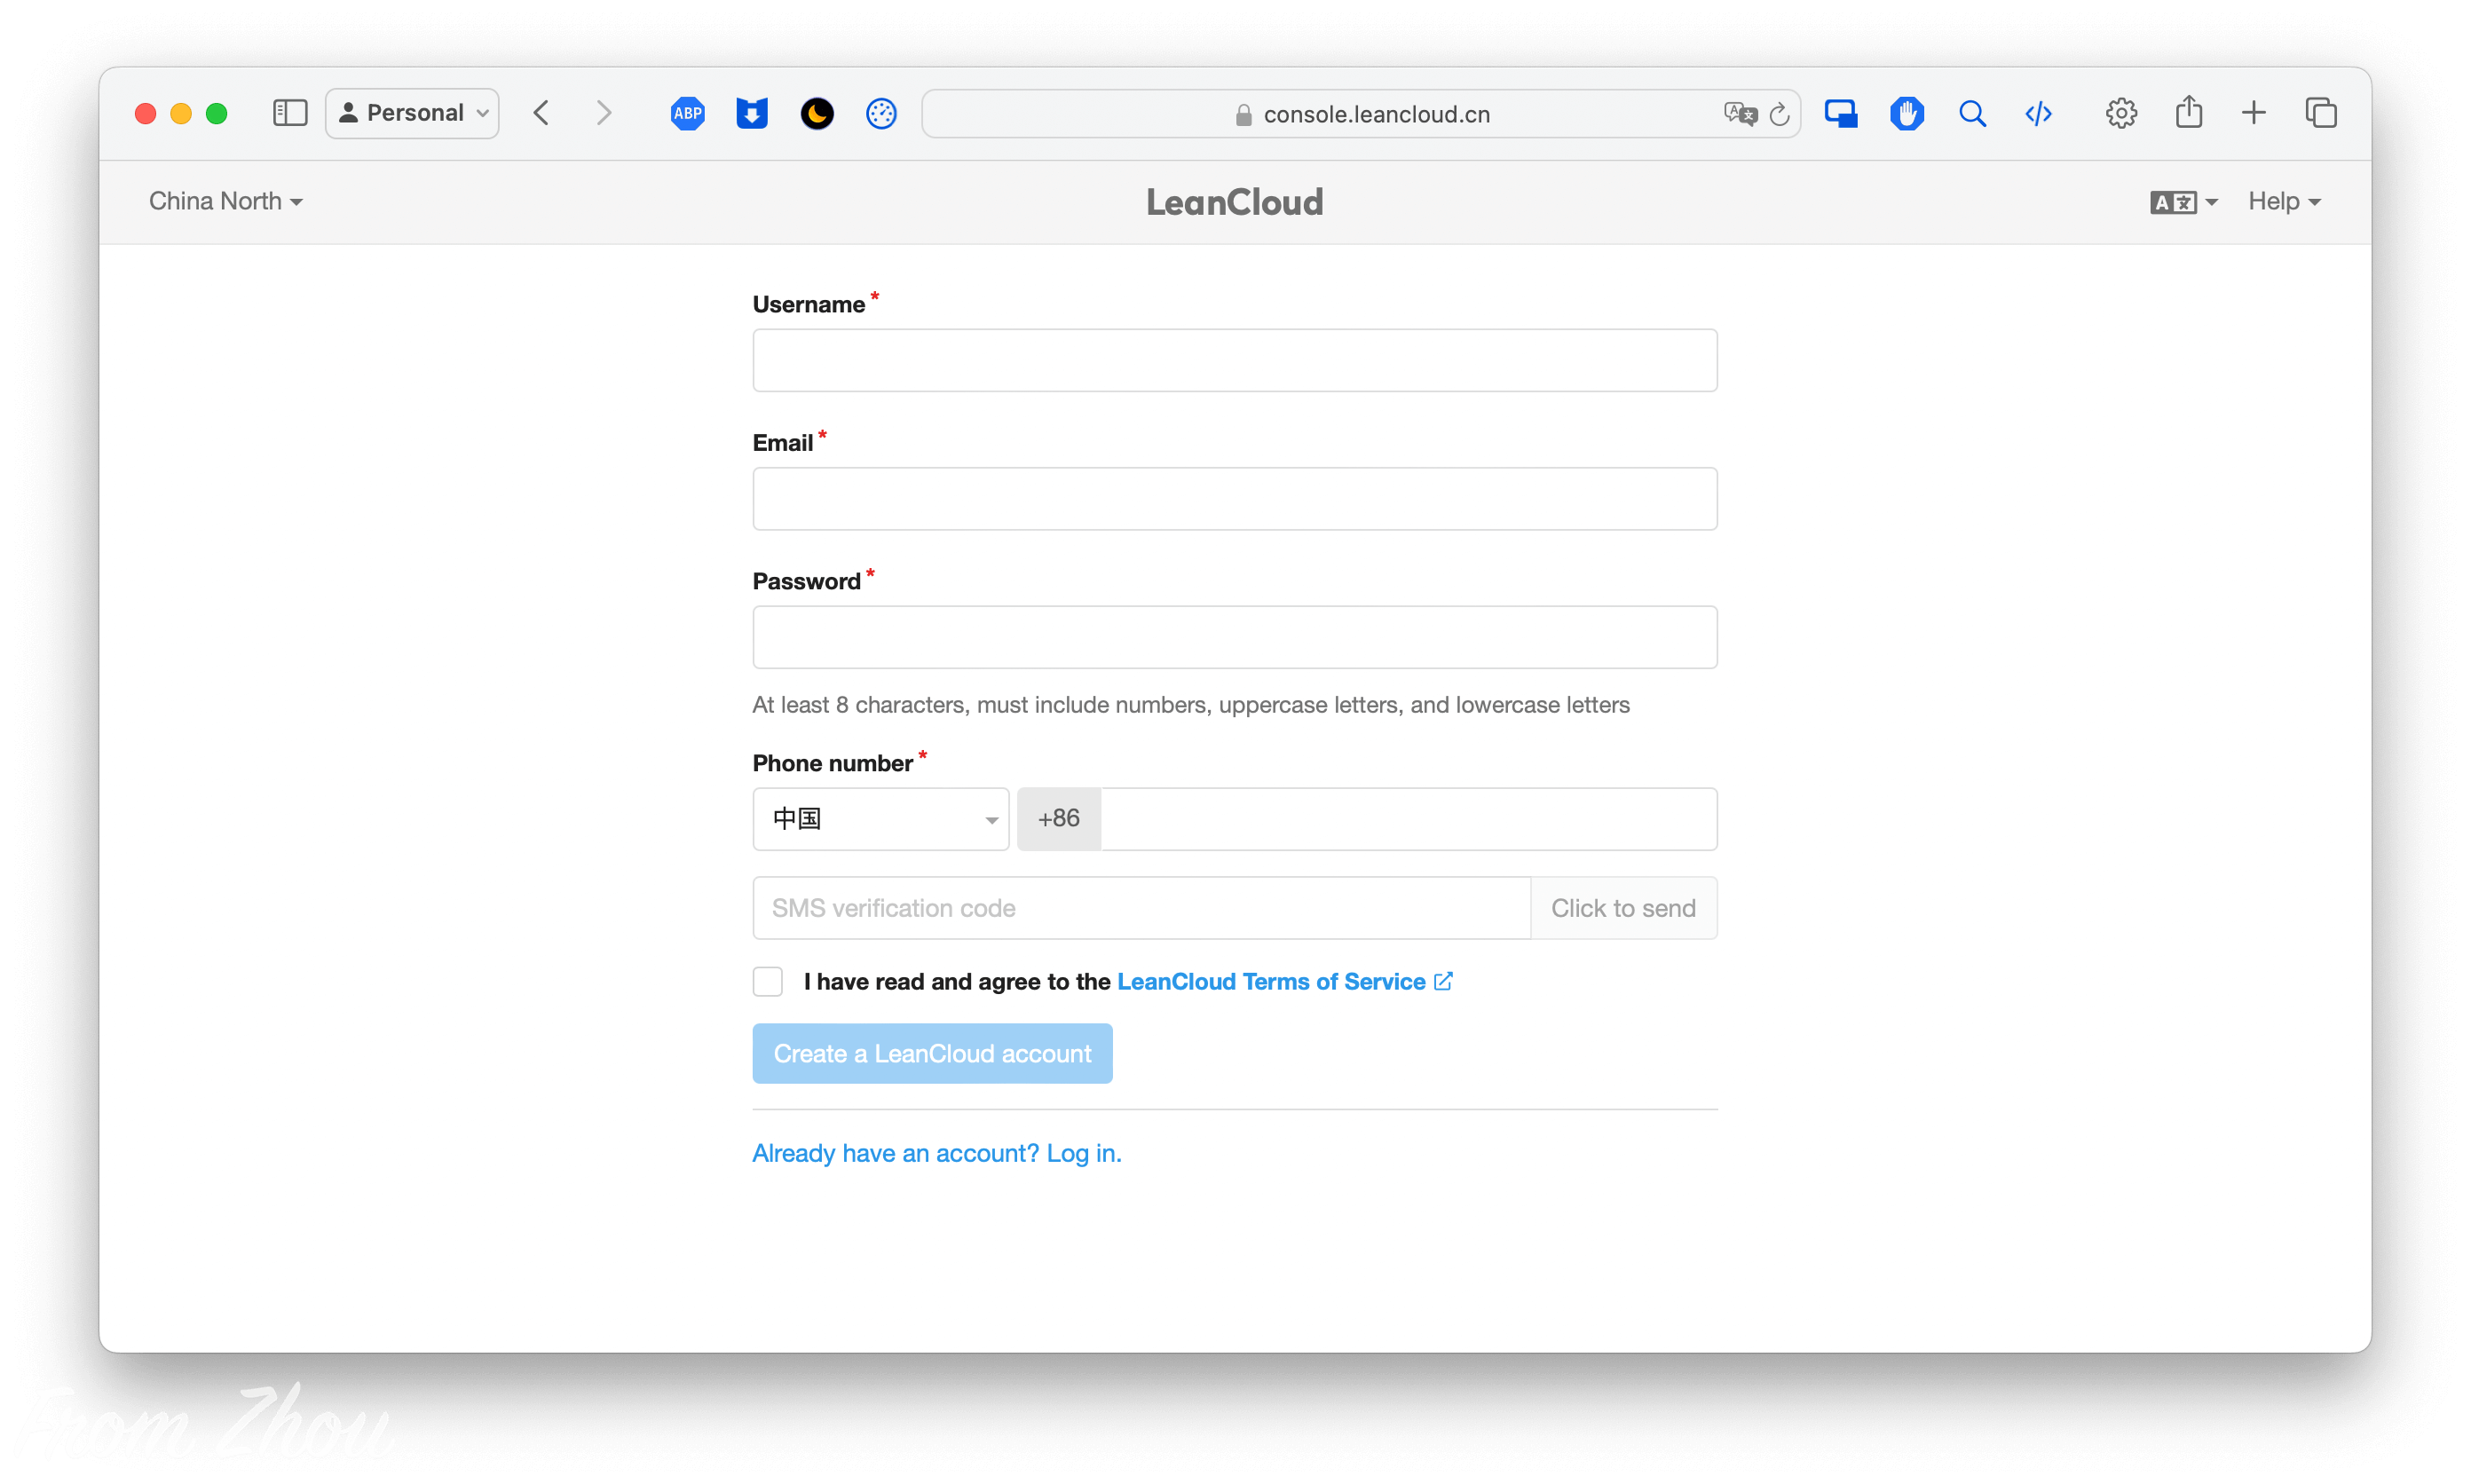
为了能够使用登录功能,请注册Leancloud作为后端
登录注册网址:https://console.leancloud.cn/register,在左上角选择华北节点
华东地区节点在2024.1.30关闭,国际版对国内评论系统有限制
创建应用
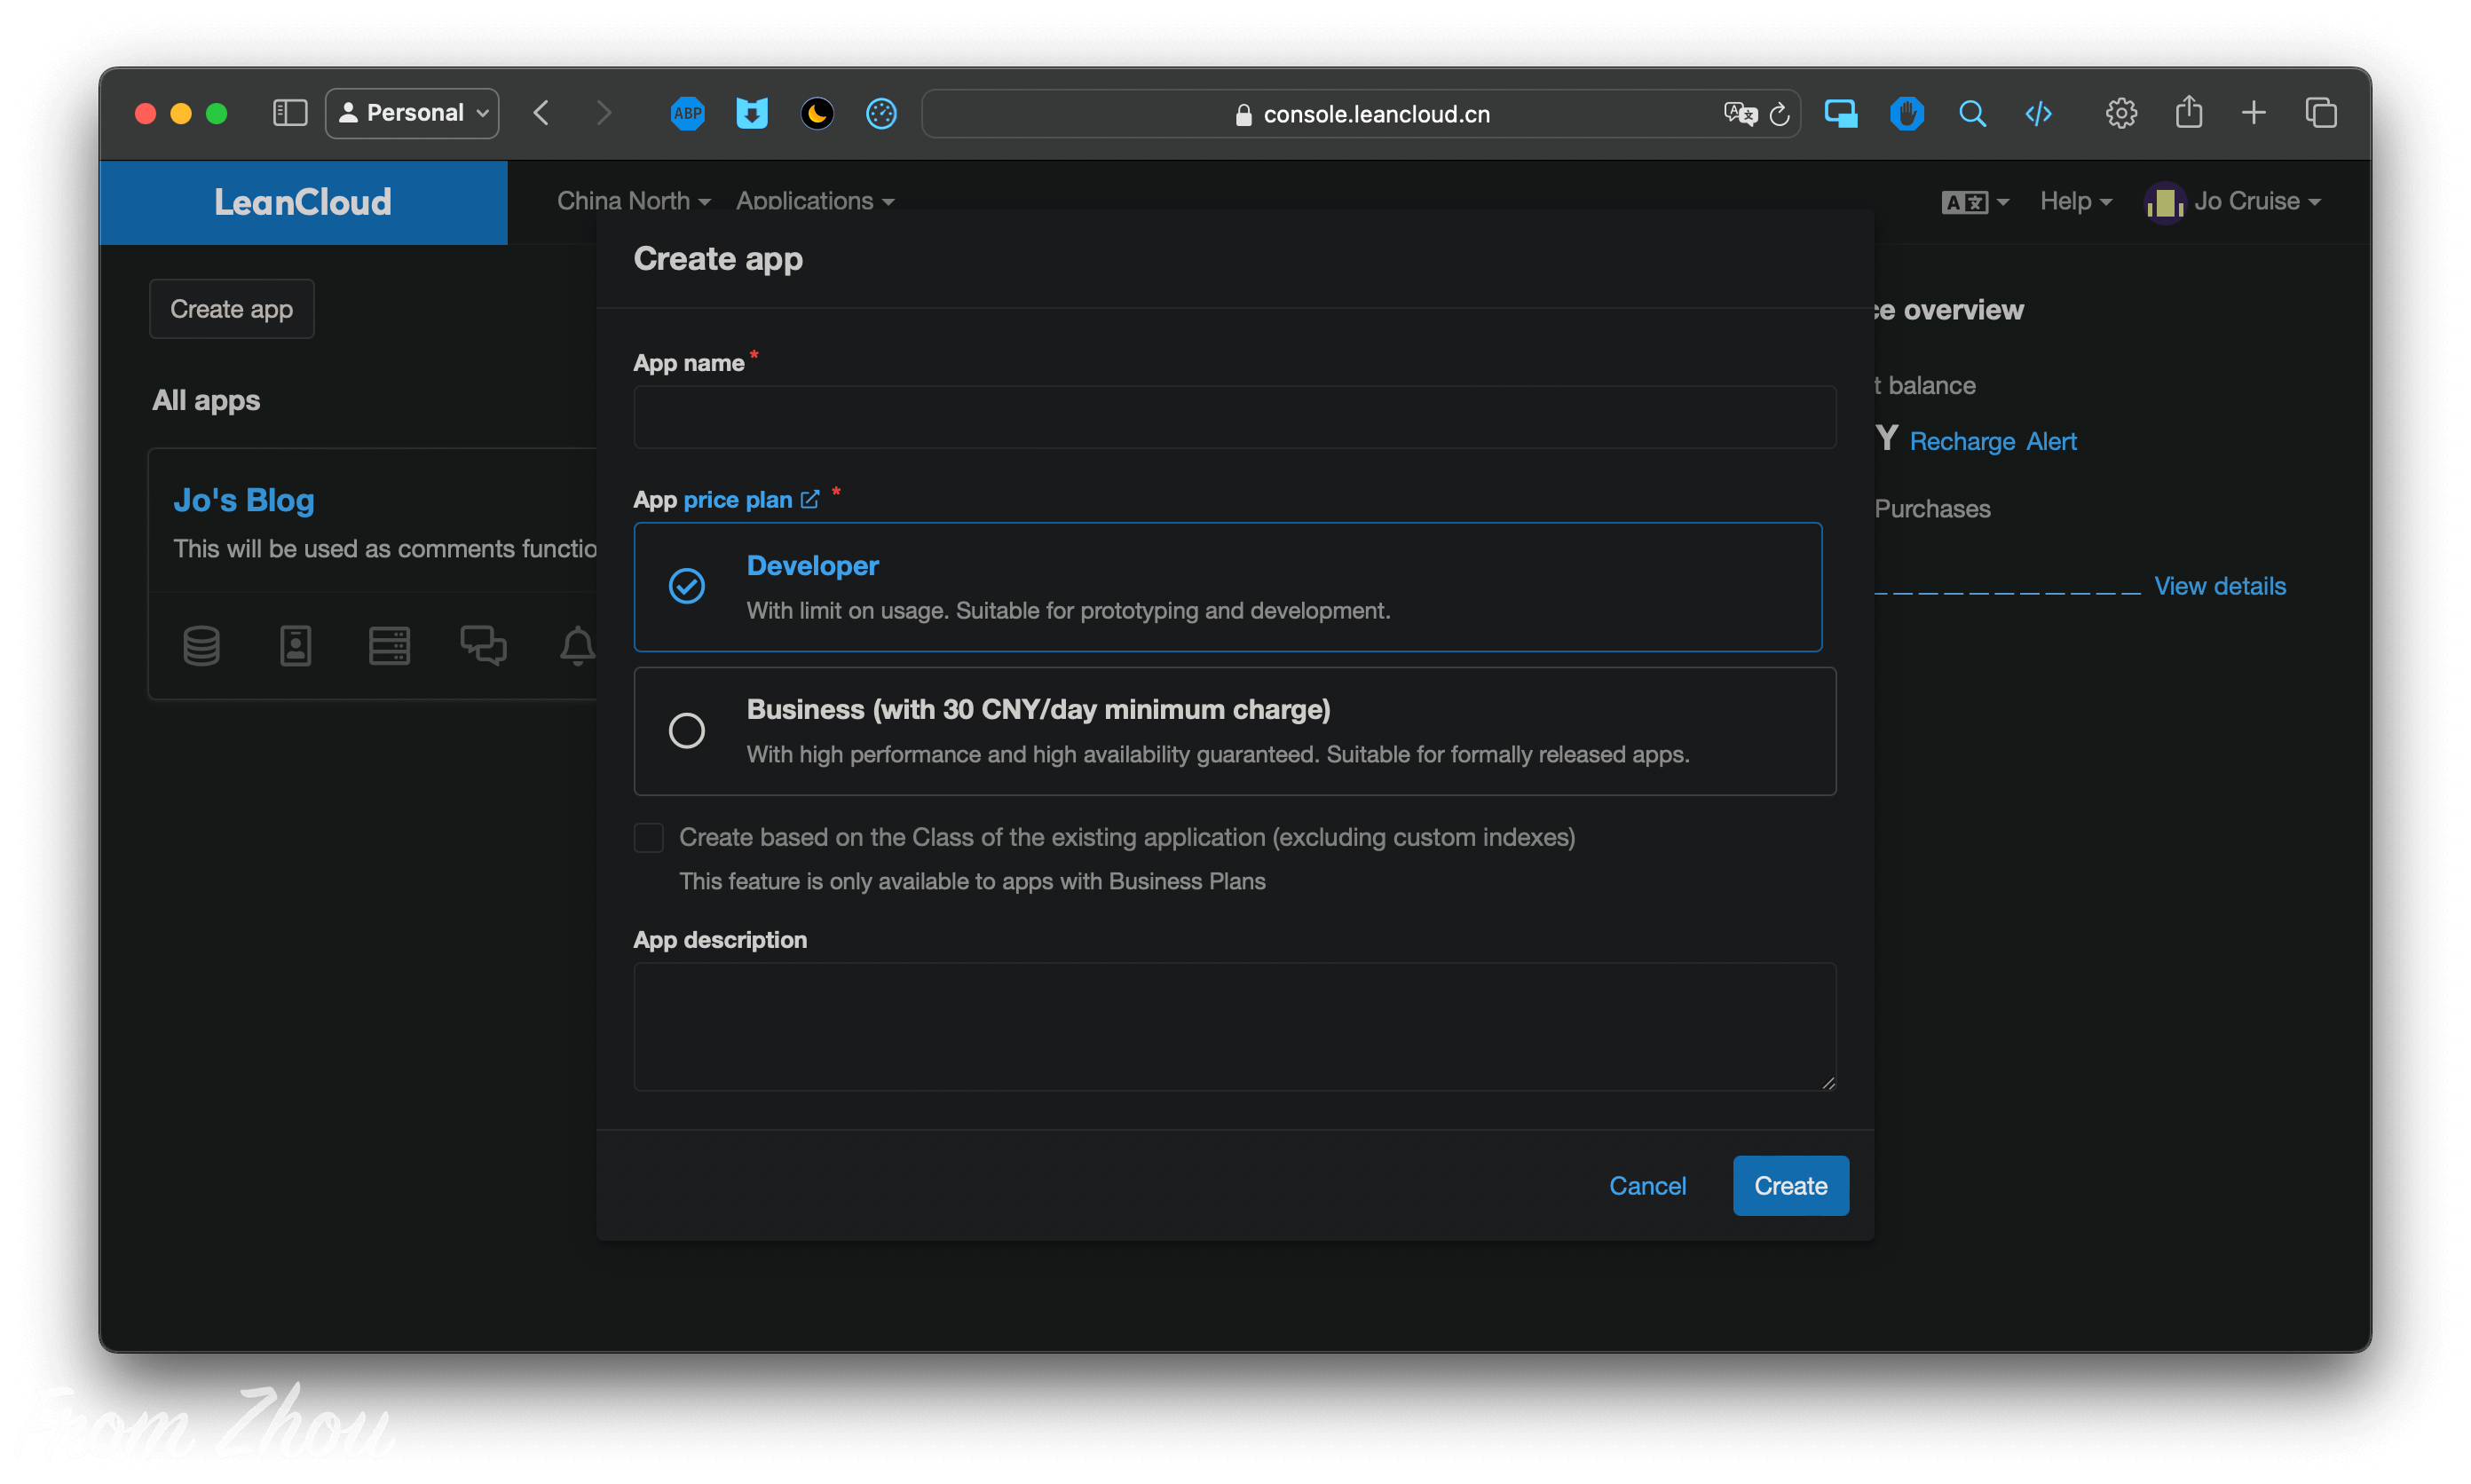
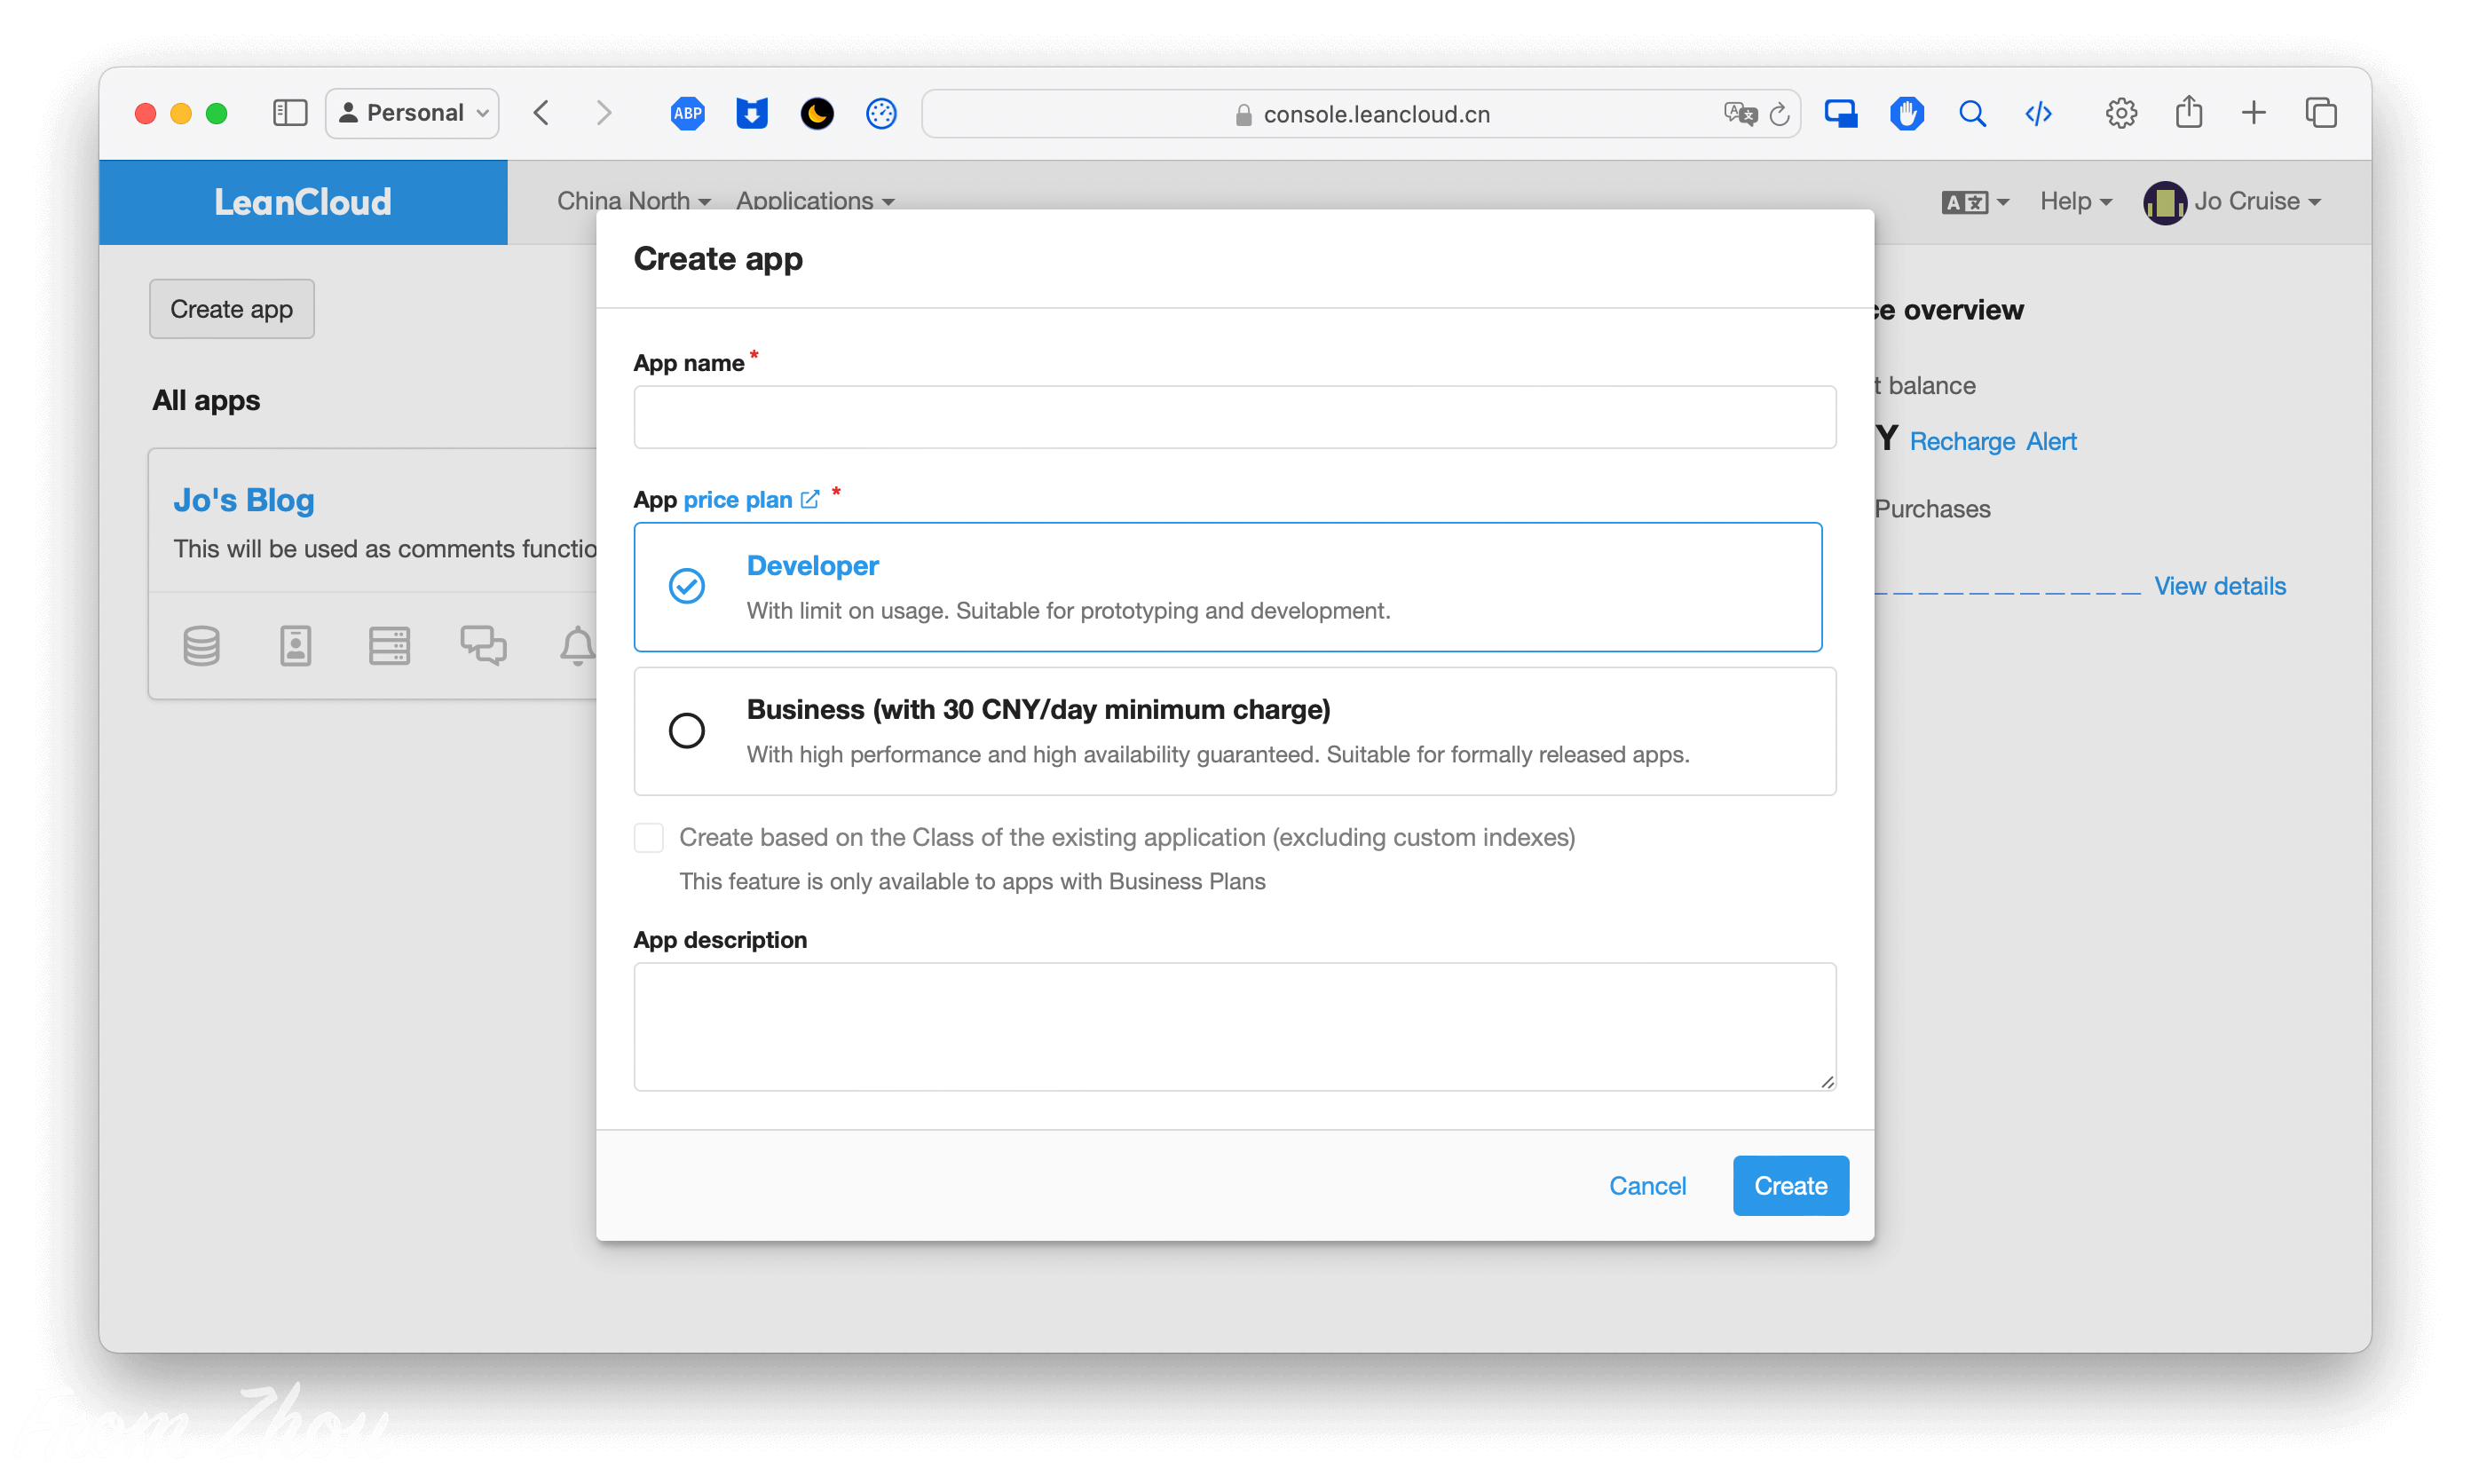
注册完成后左上角选择Create app,App name随意取,在”App price plan”中选择Developer,完成后点击Create
应用设置
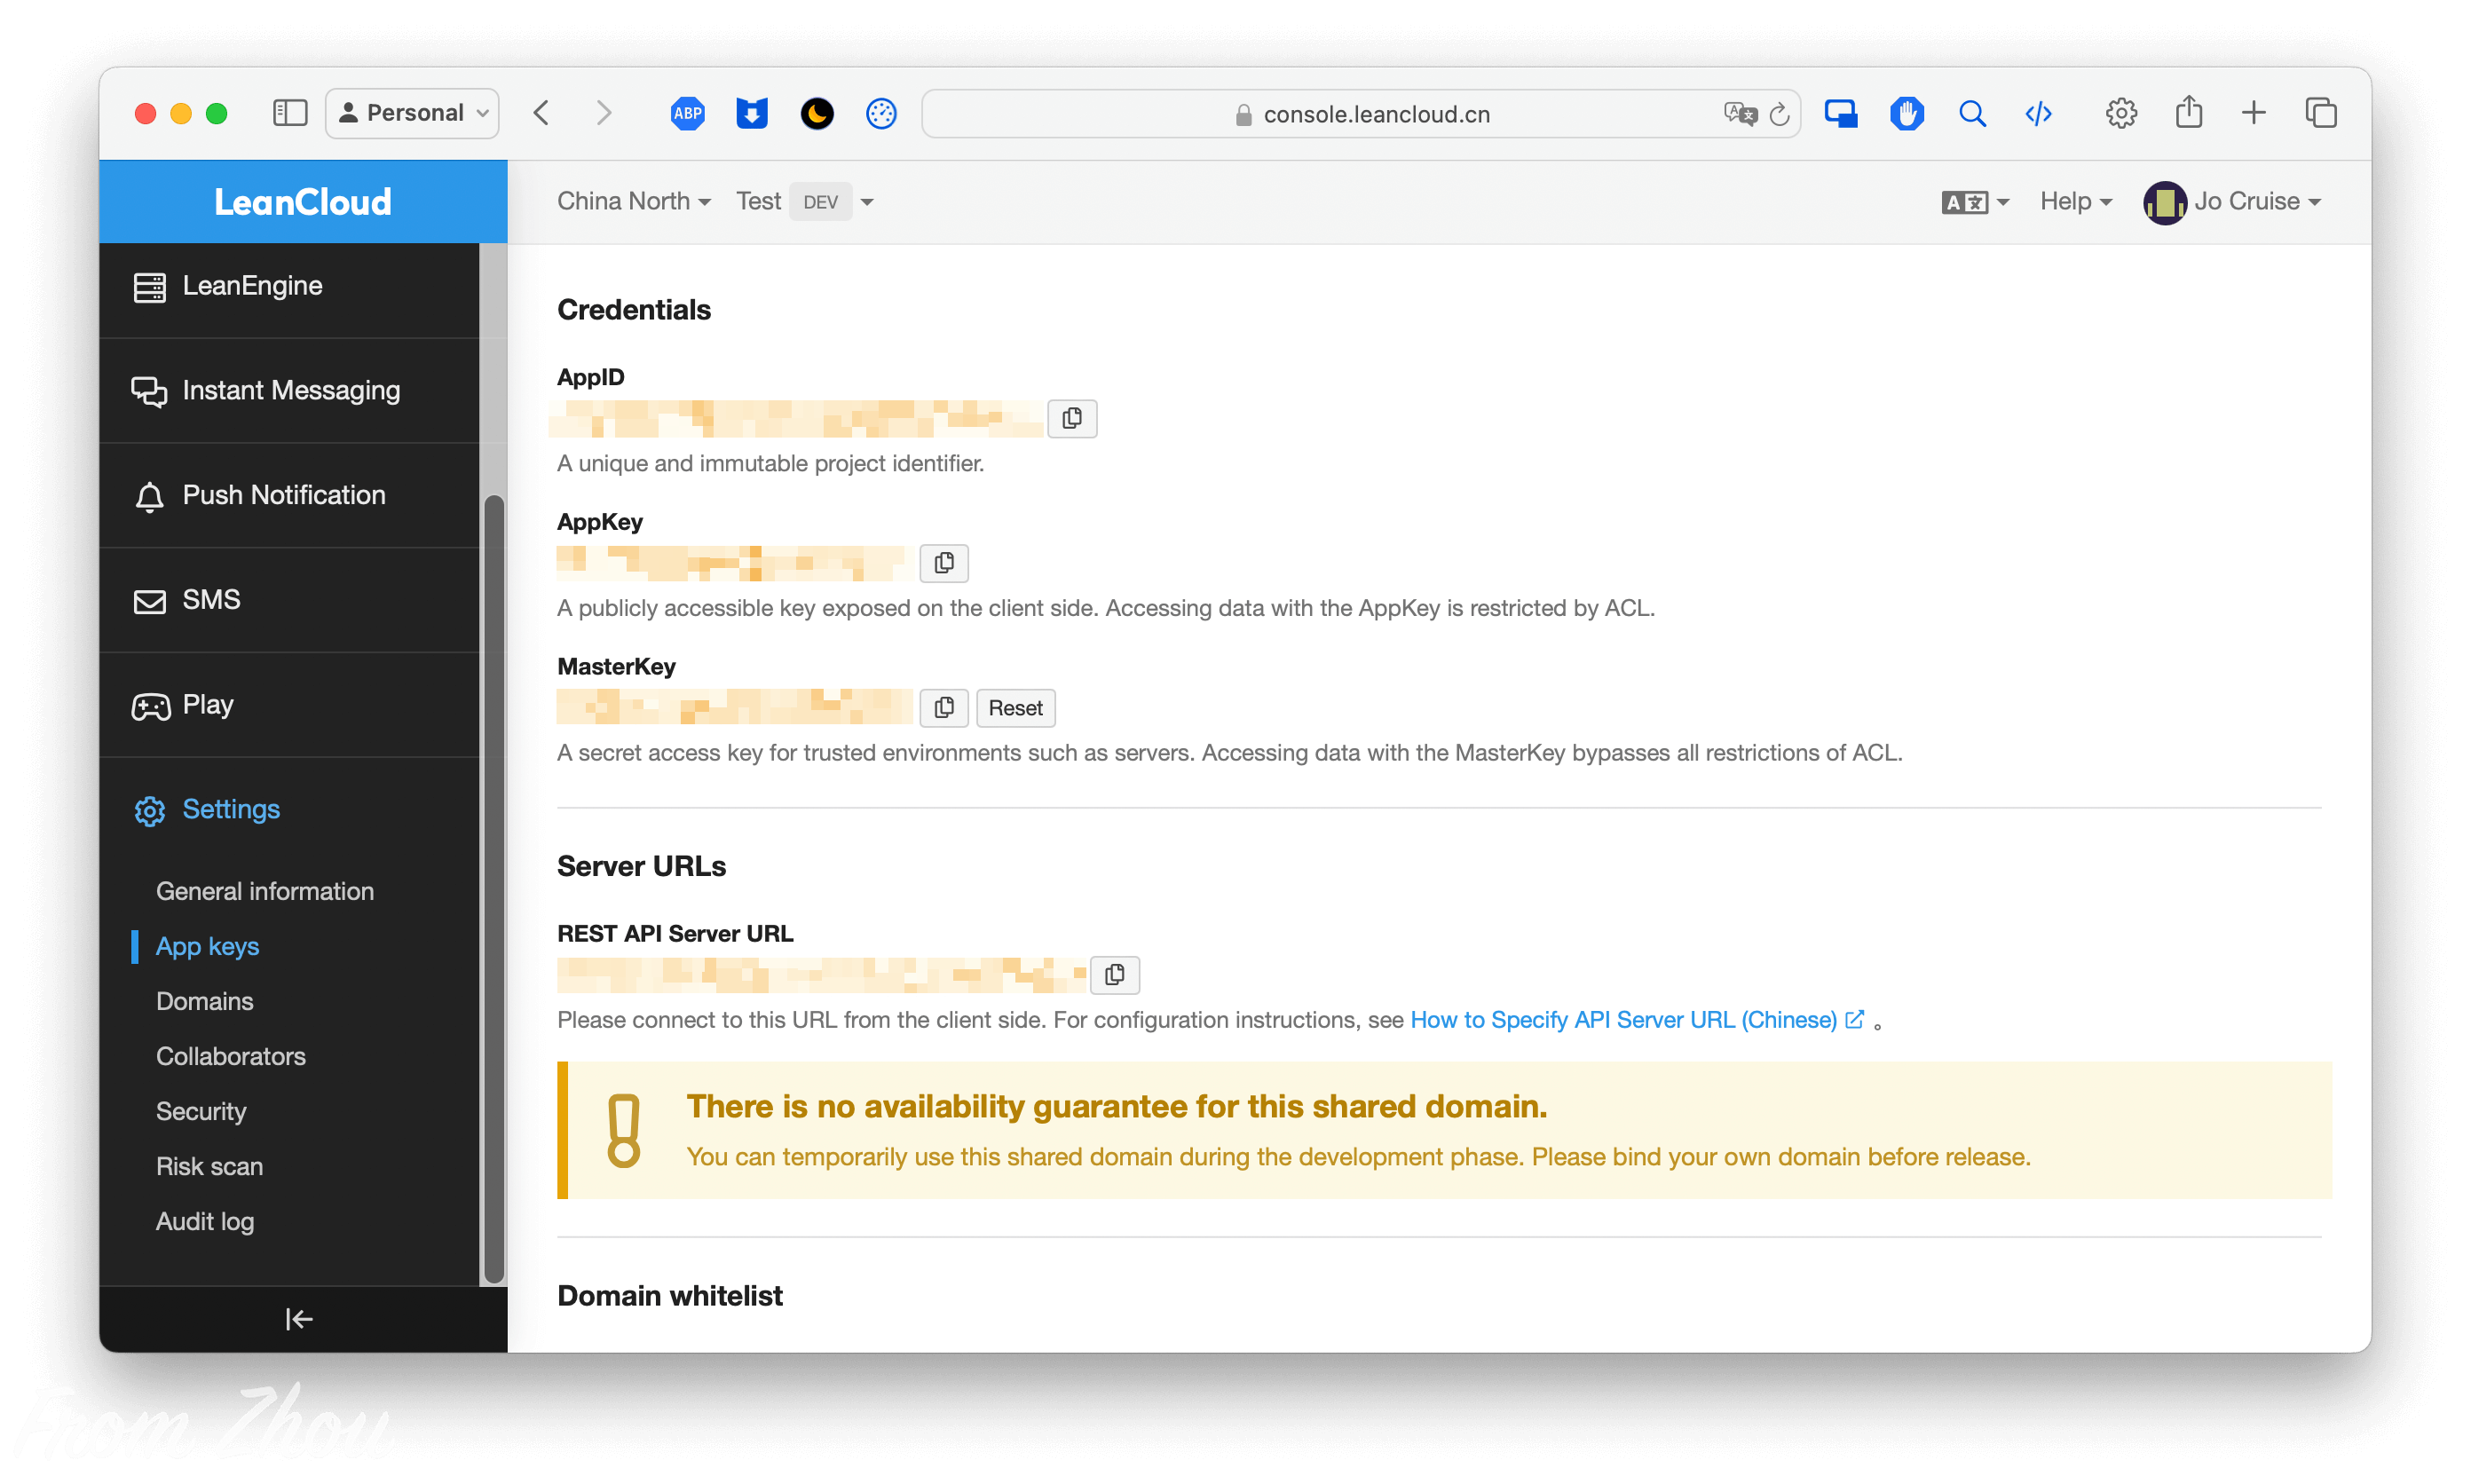
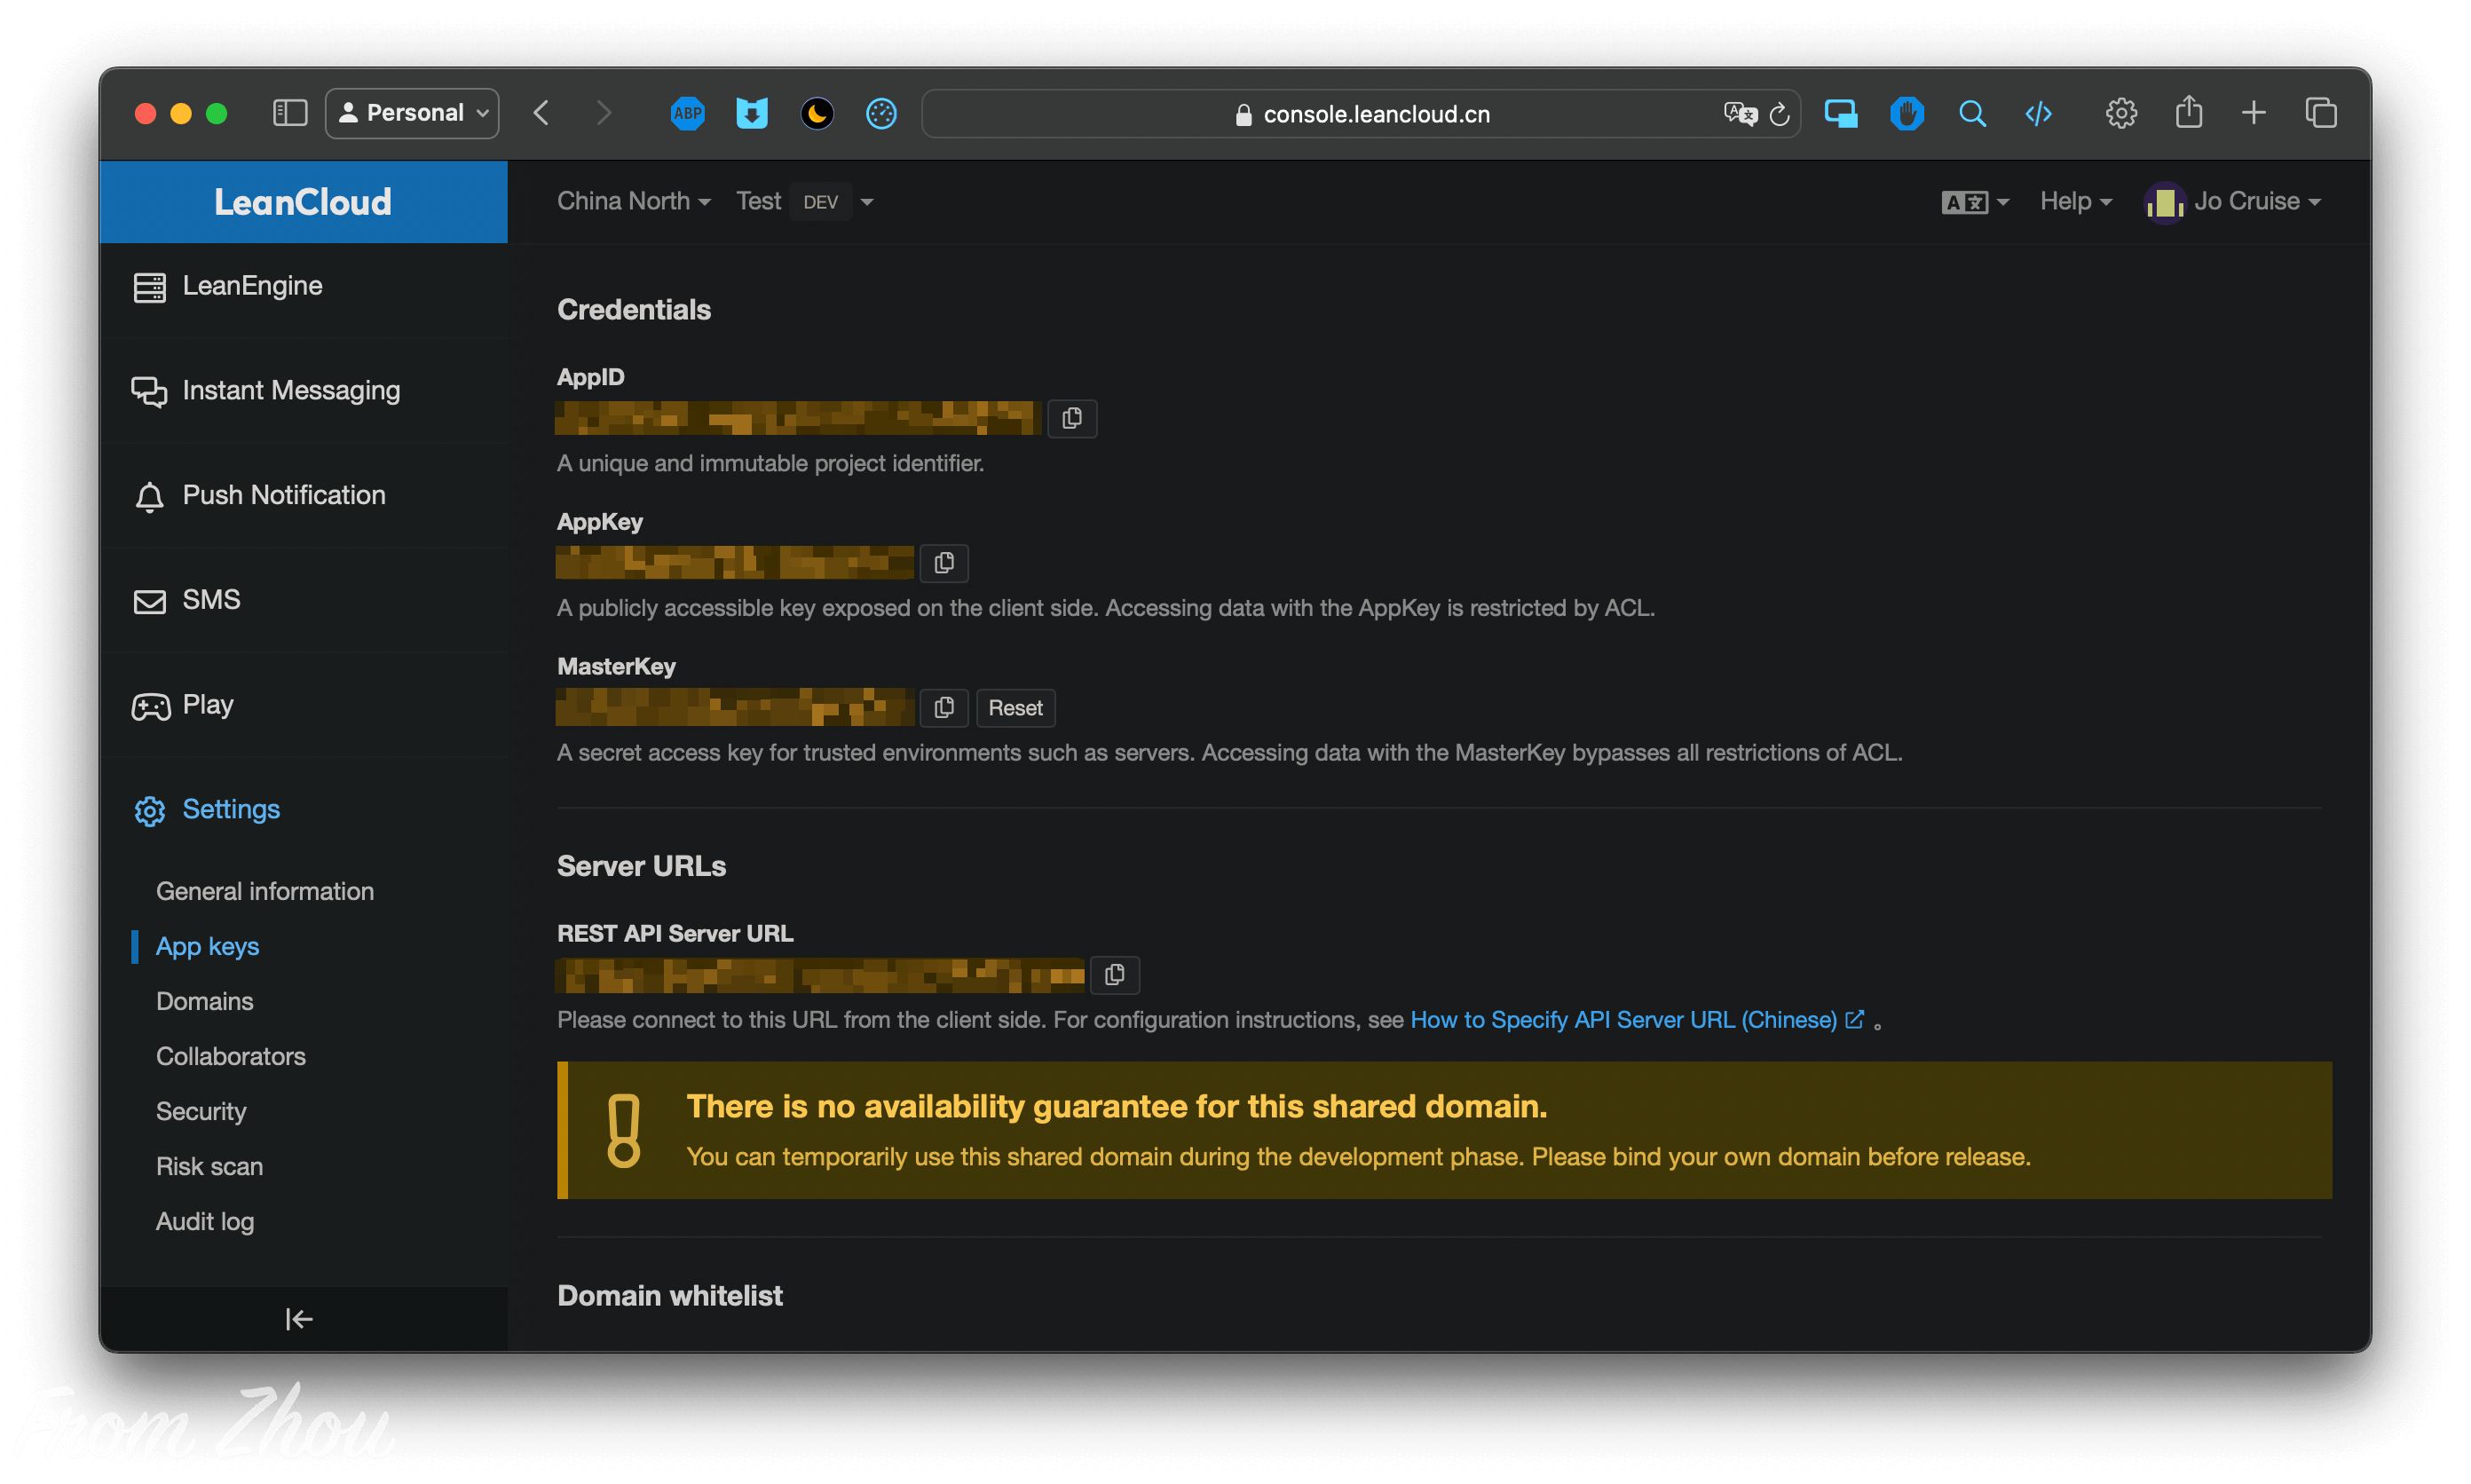
进入app的设置,在侧边栏选择”Settings”-“App keys”(可能需要向下滚动)
这里的AppID、AppKey和Server URLs对应_config.yml文件中的相应内容
1
2
3
4
5
Leancloud:
  appId: 'example' # fill with your Leancloud appId
  appKey: 'example' # fill with your Leancloud appKey
  serverURL: 'example' # fill with your Leancloud serverURL
  allowRegister: true # allow registration for your website
AppID:全局唯一的应用标识符,不可变更。
AppKey:公开的访问密钥,适用于在公开的客户端中使用。使用 AppKey 进行的访问受到 ACL 等权限限制。
MasterKey:私密的访问密钥,适用于在服务器等受信任环境中使用。使用 MasterKey 进行的访问拥有最高权限,不受 ACL 等权限限制。
安全
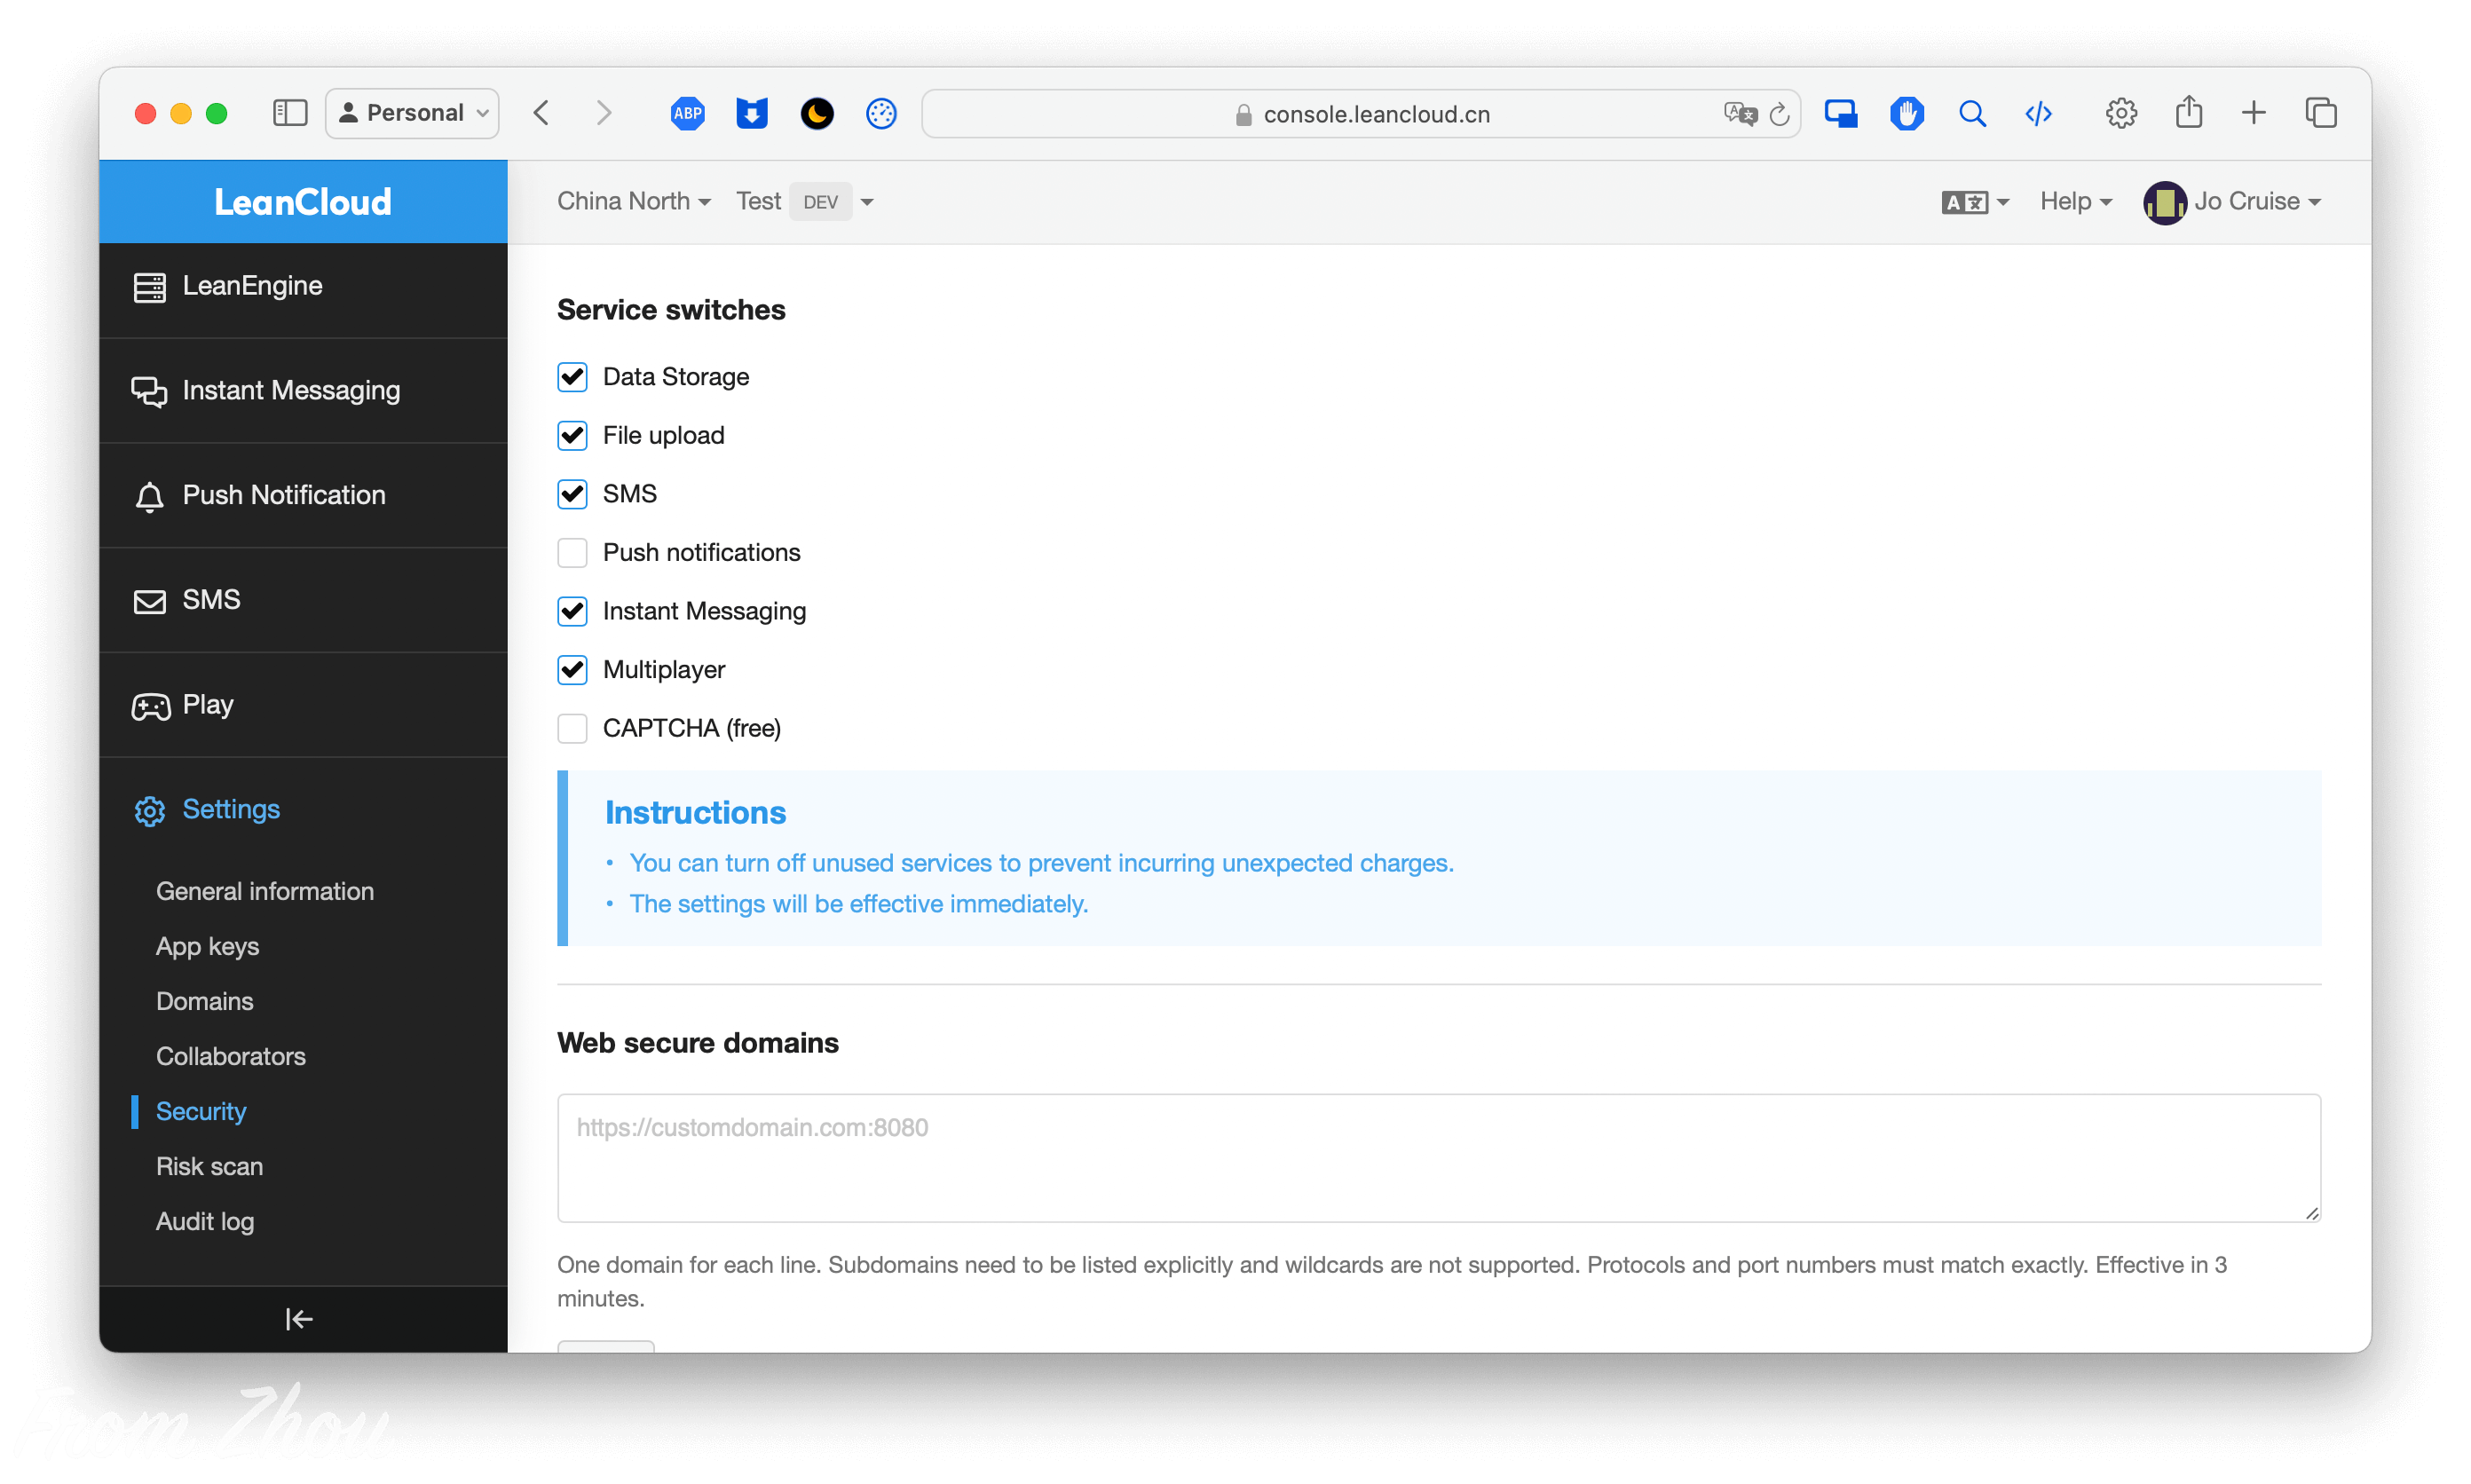
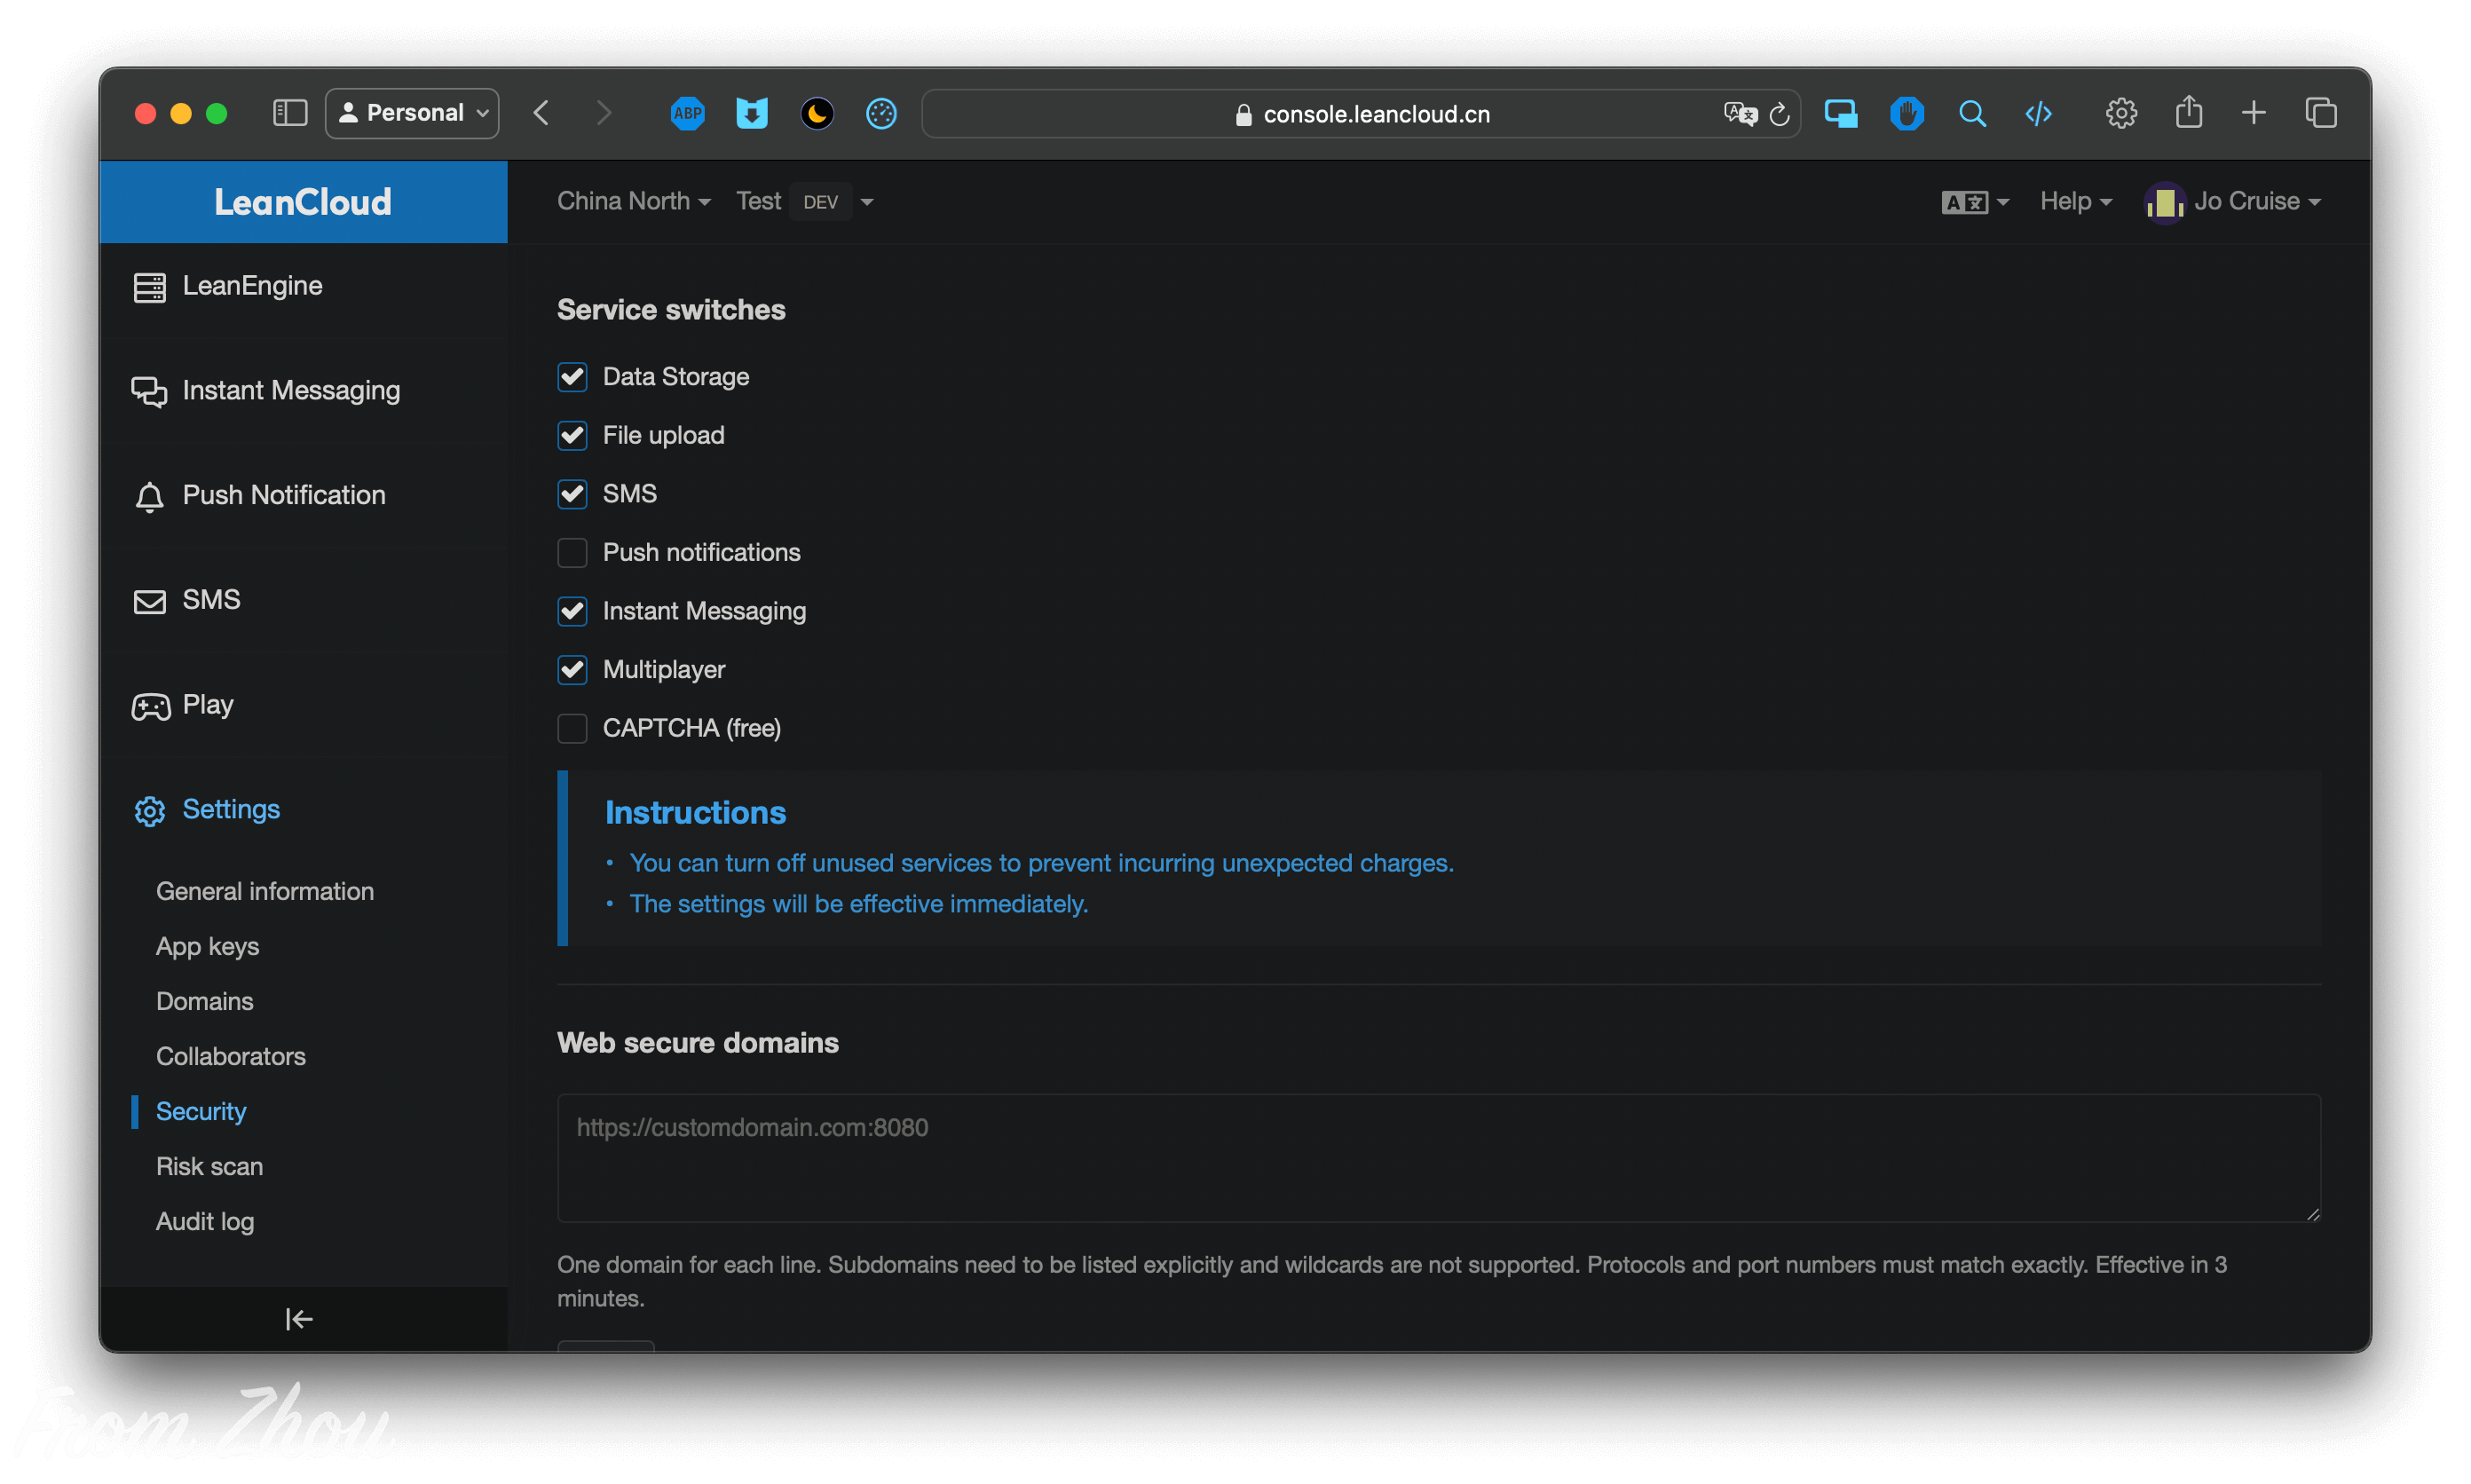
由于App ID、App Key、ServerURL是在配置文件中以明文形式储存的,使用为了安全,请在”Settings”-“Security”(可能需要向下滚动)中的”Web secure domains”下的文本框中添加您的域名,例如https://username.github.io。同时为了方便在本地调试,可以添加127.0.0.1:4000
127.0.0.是本机ip,4000是本地调试端口号,如果您未修改过相关配置,Jekyll默认使用4000端口
当添加多个域名的时候需要换行
用户信息存储
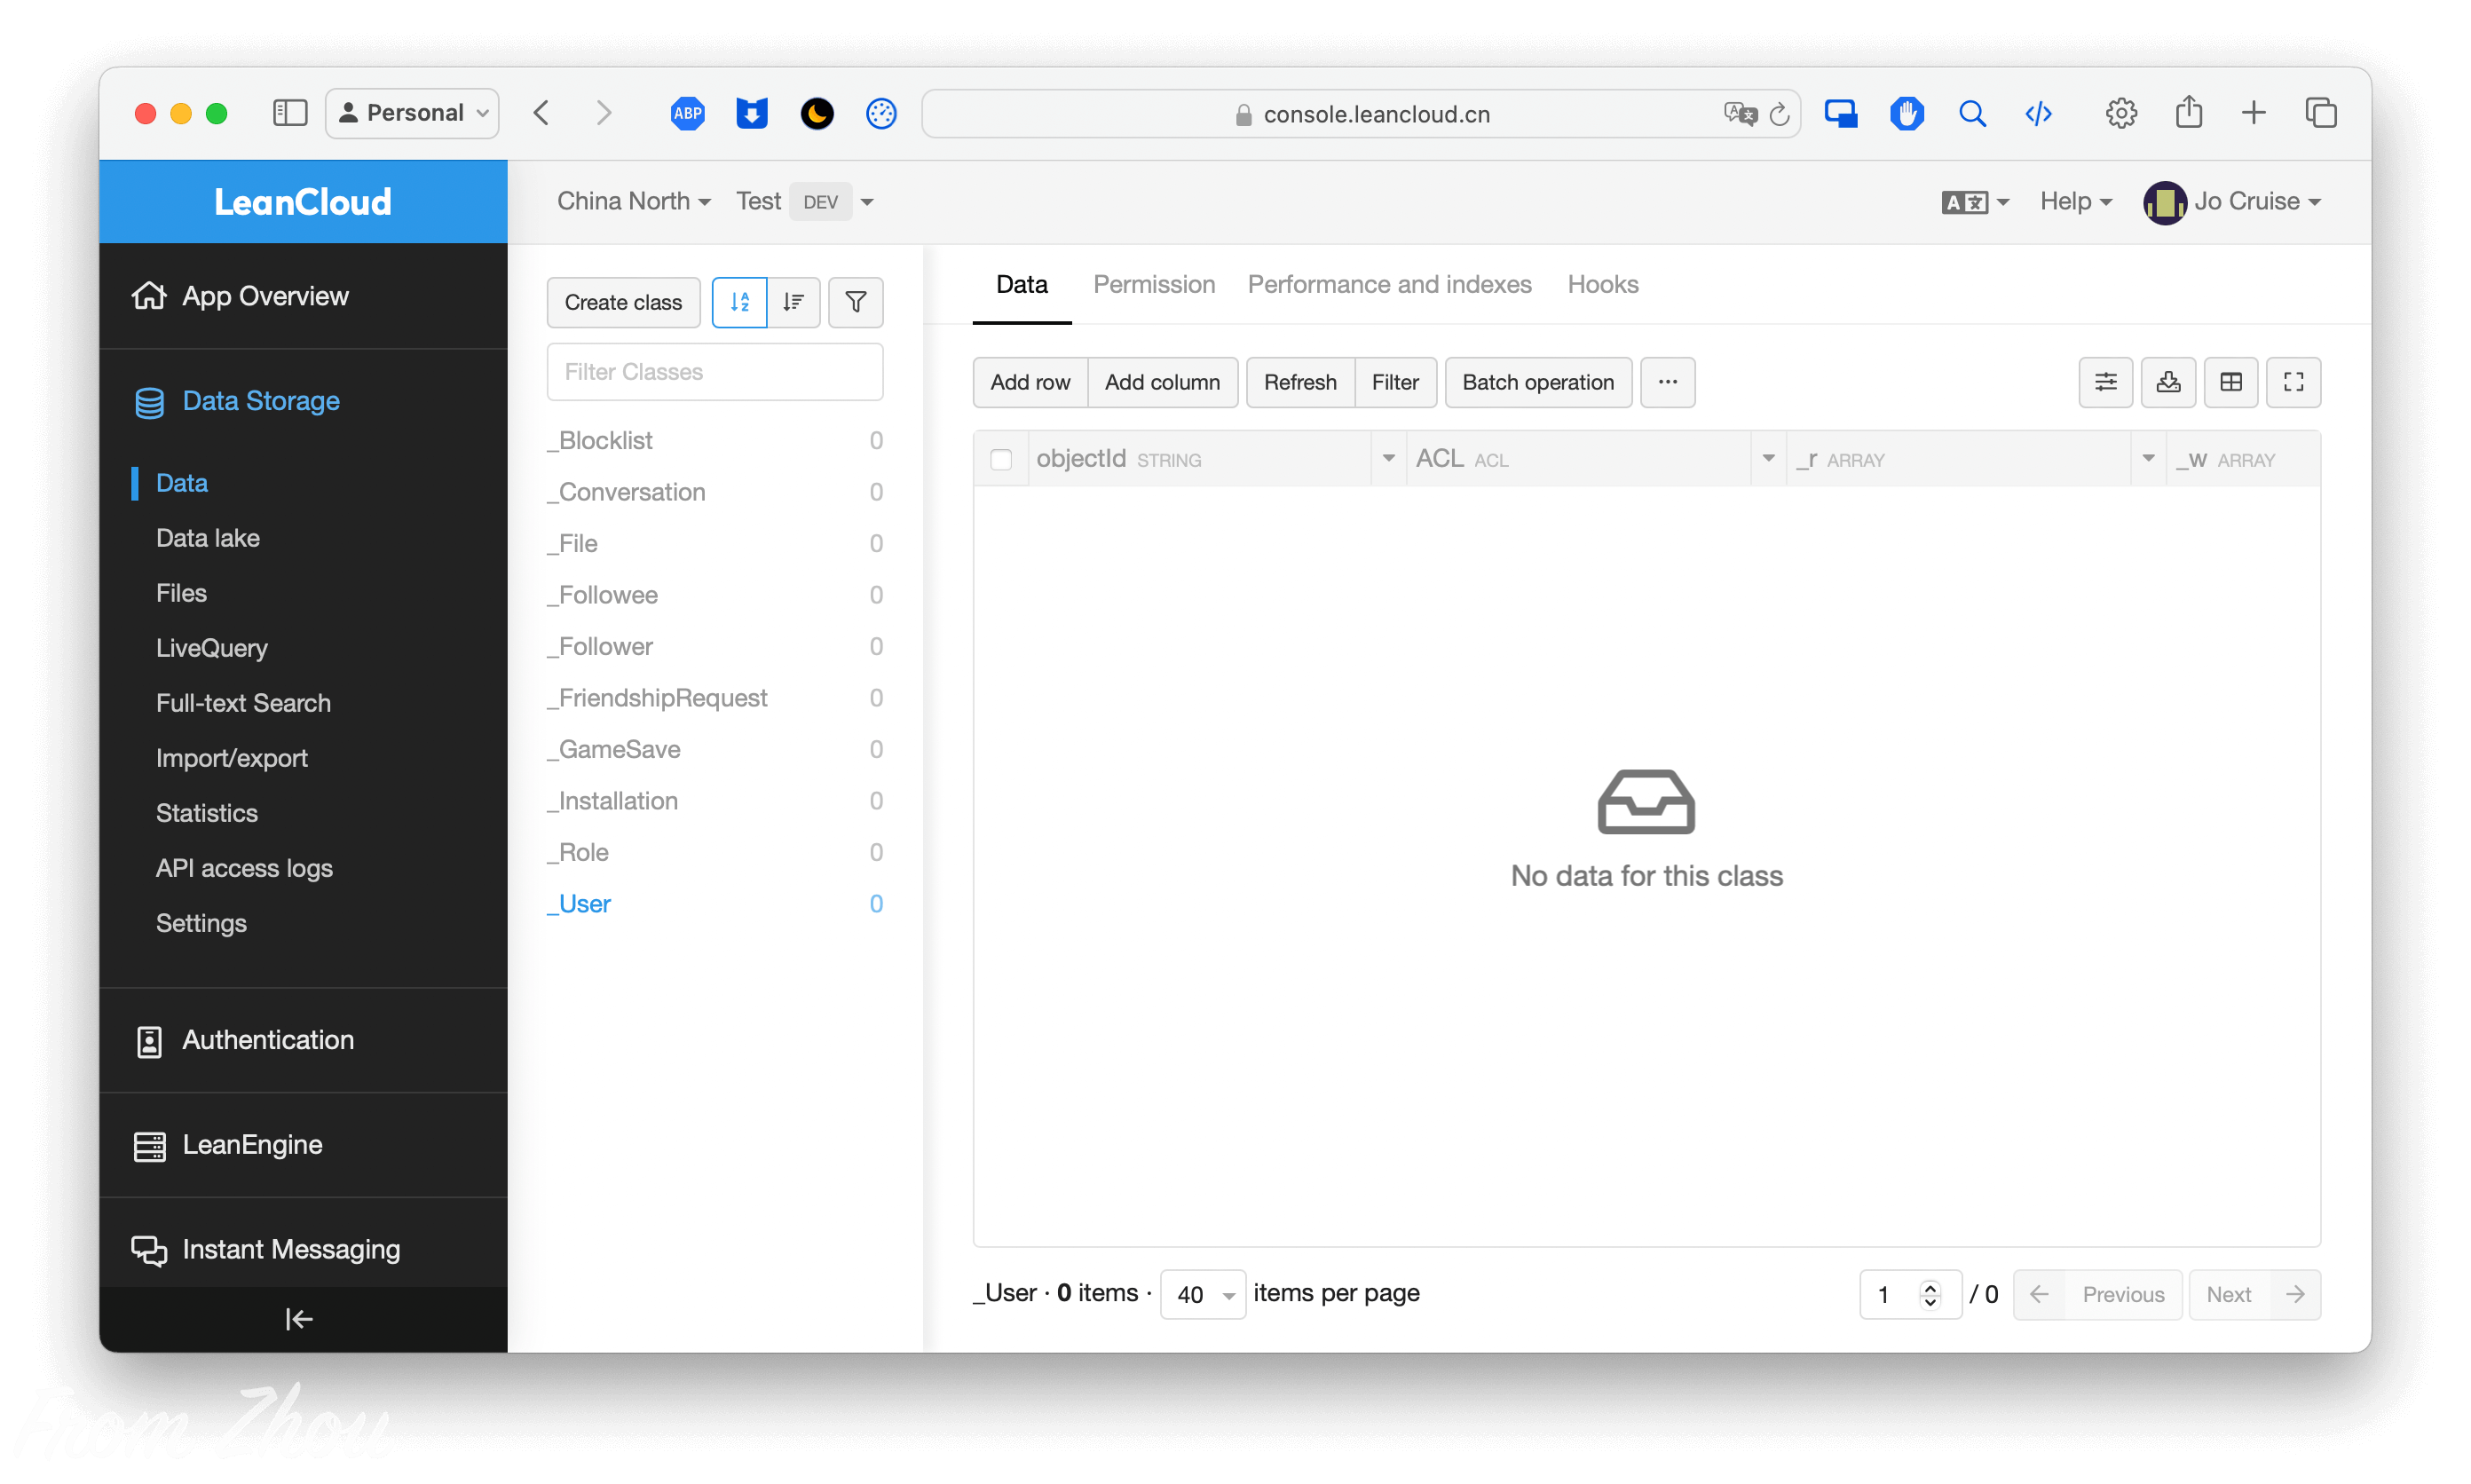
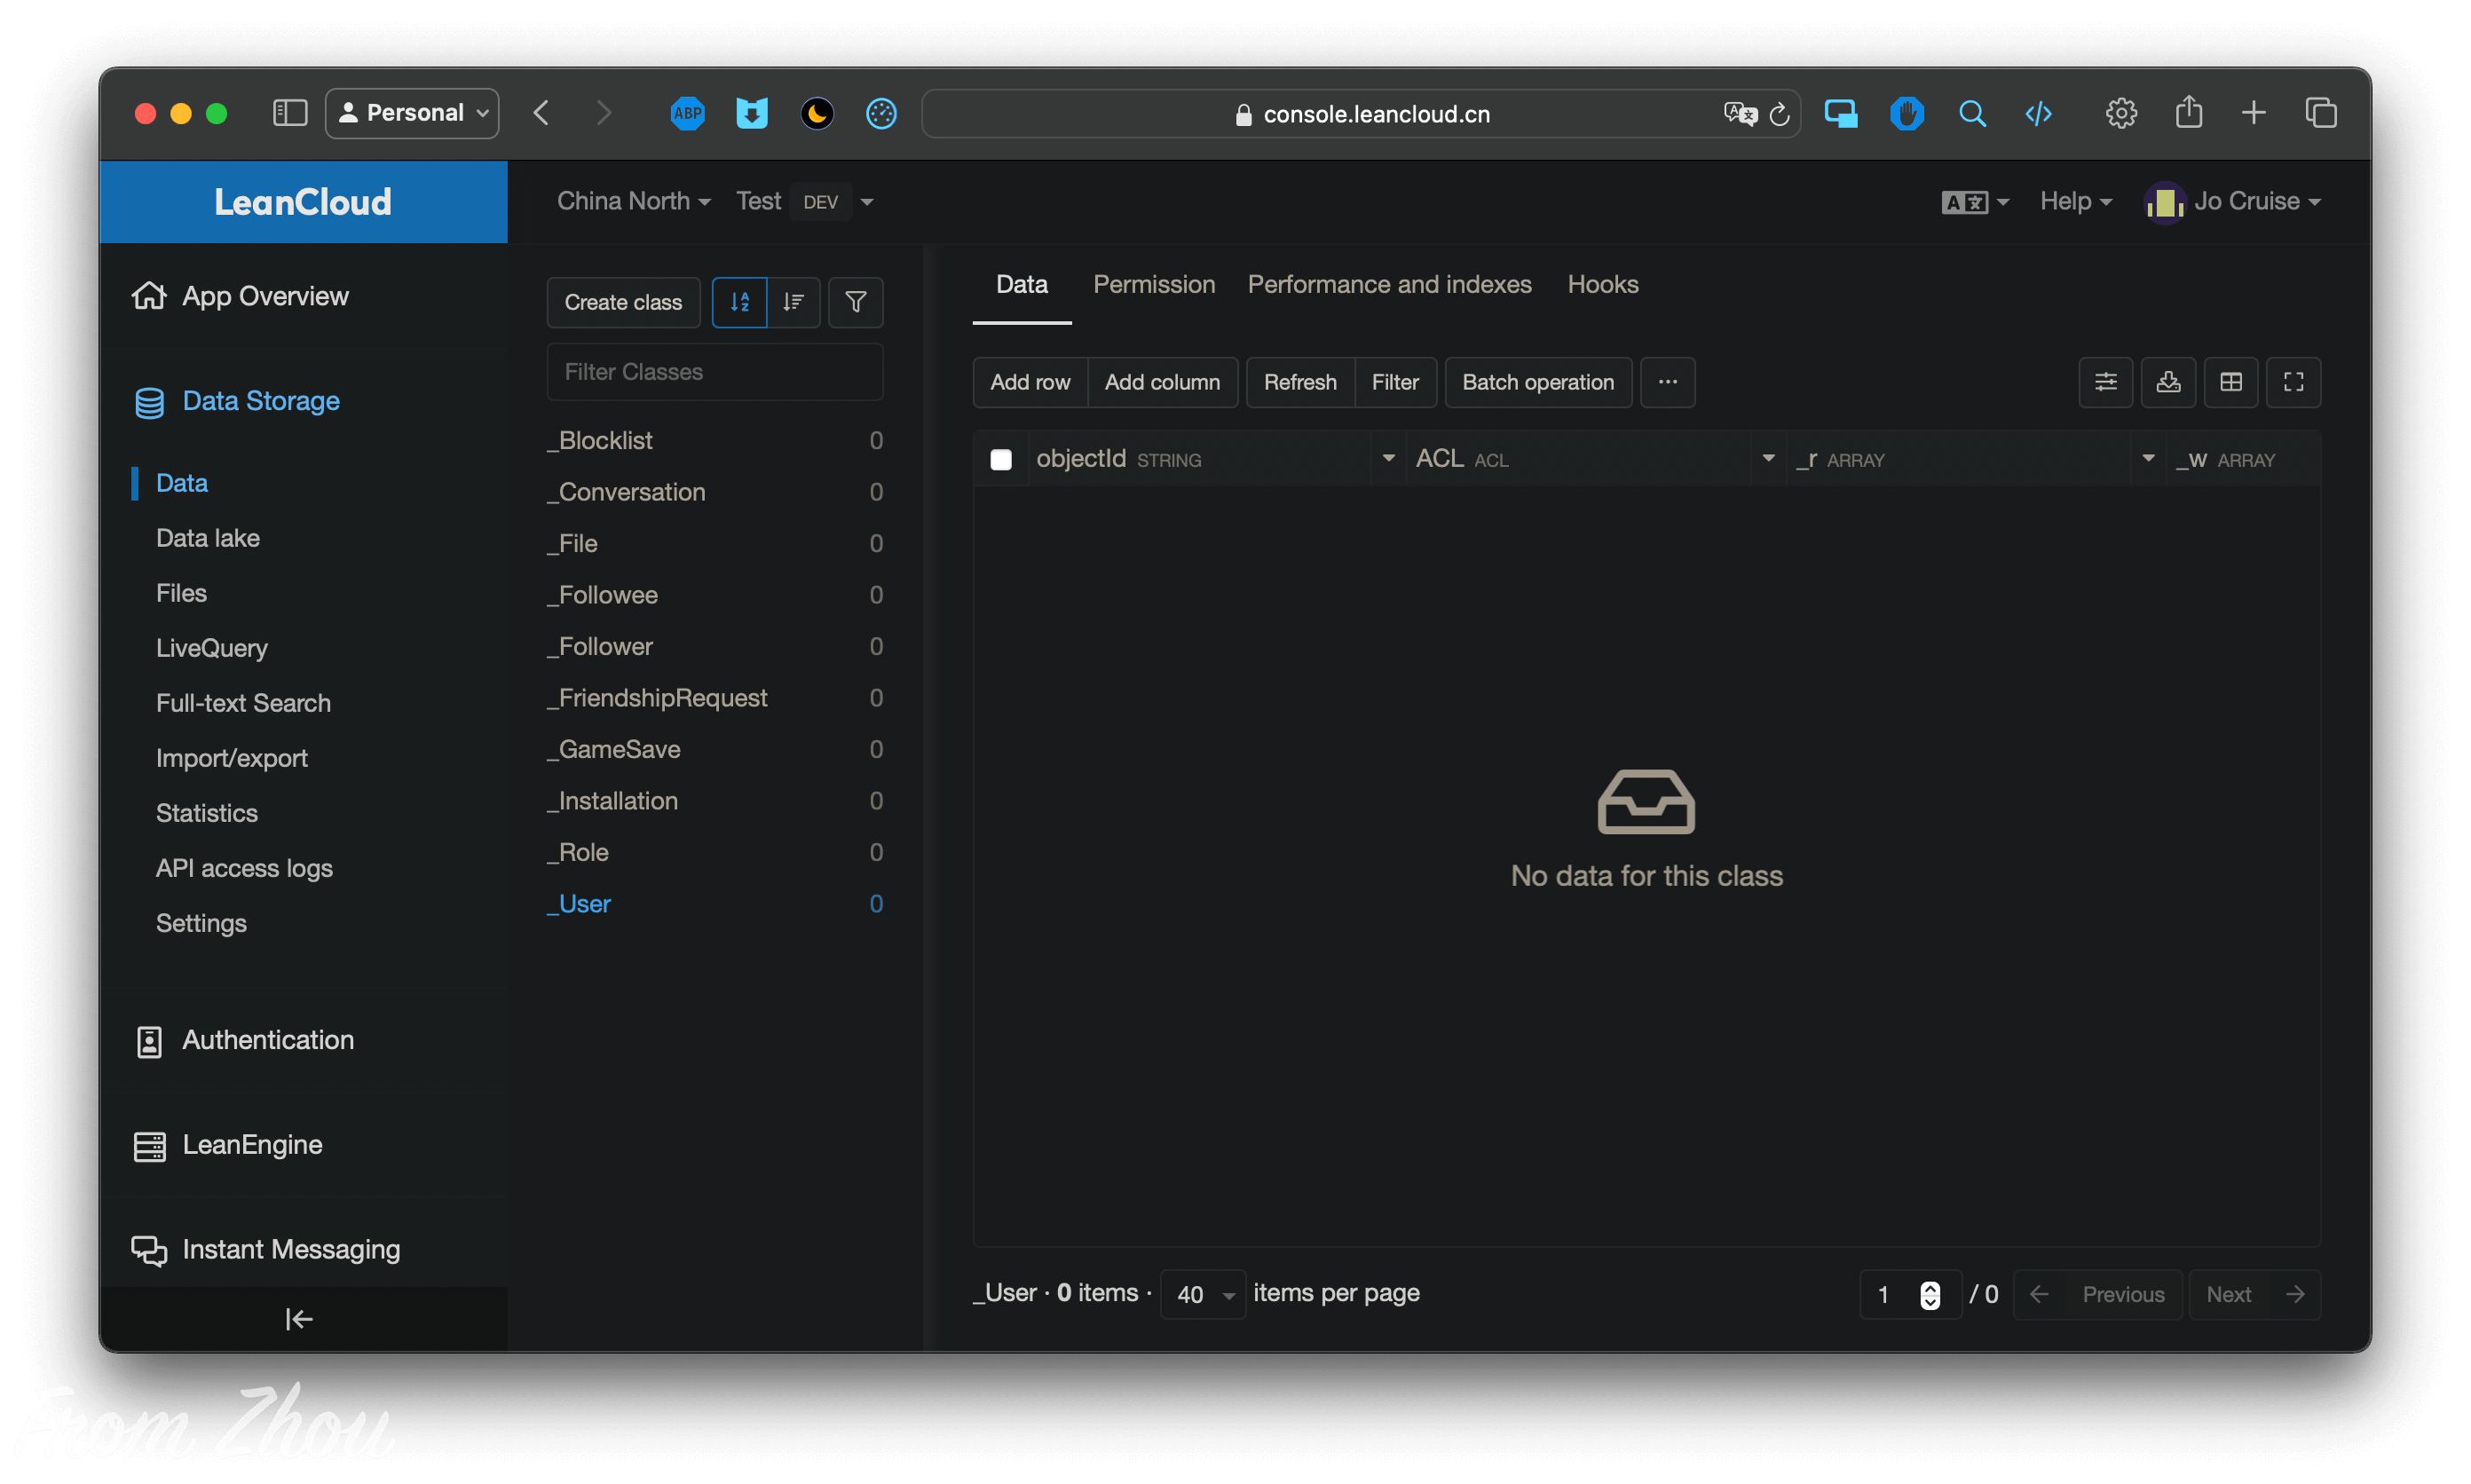
用户信息存储在”Data Storage”-“Data”(可能需要向下滚动)下的”_User”内。
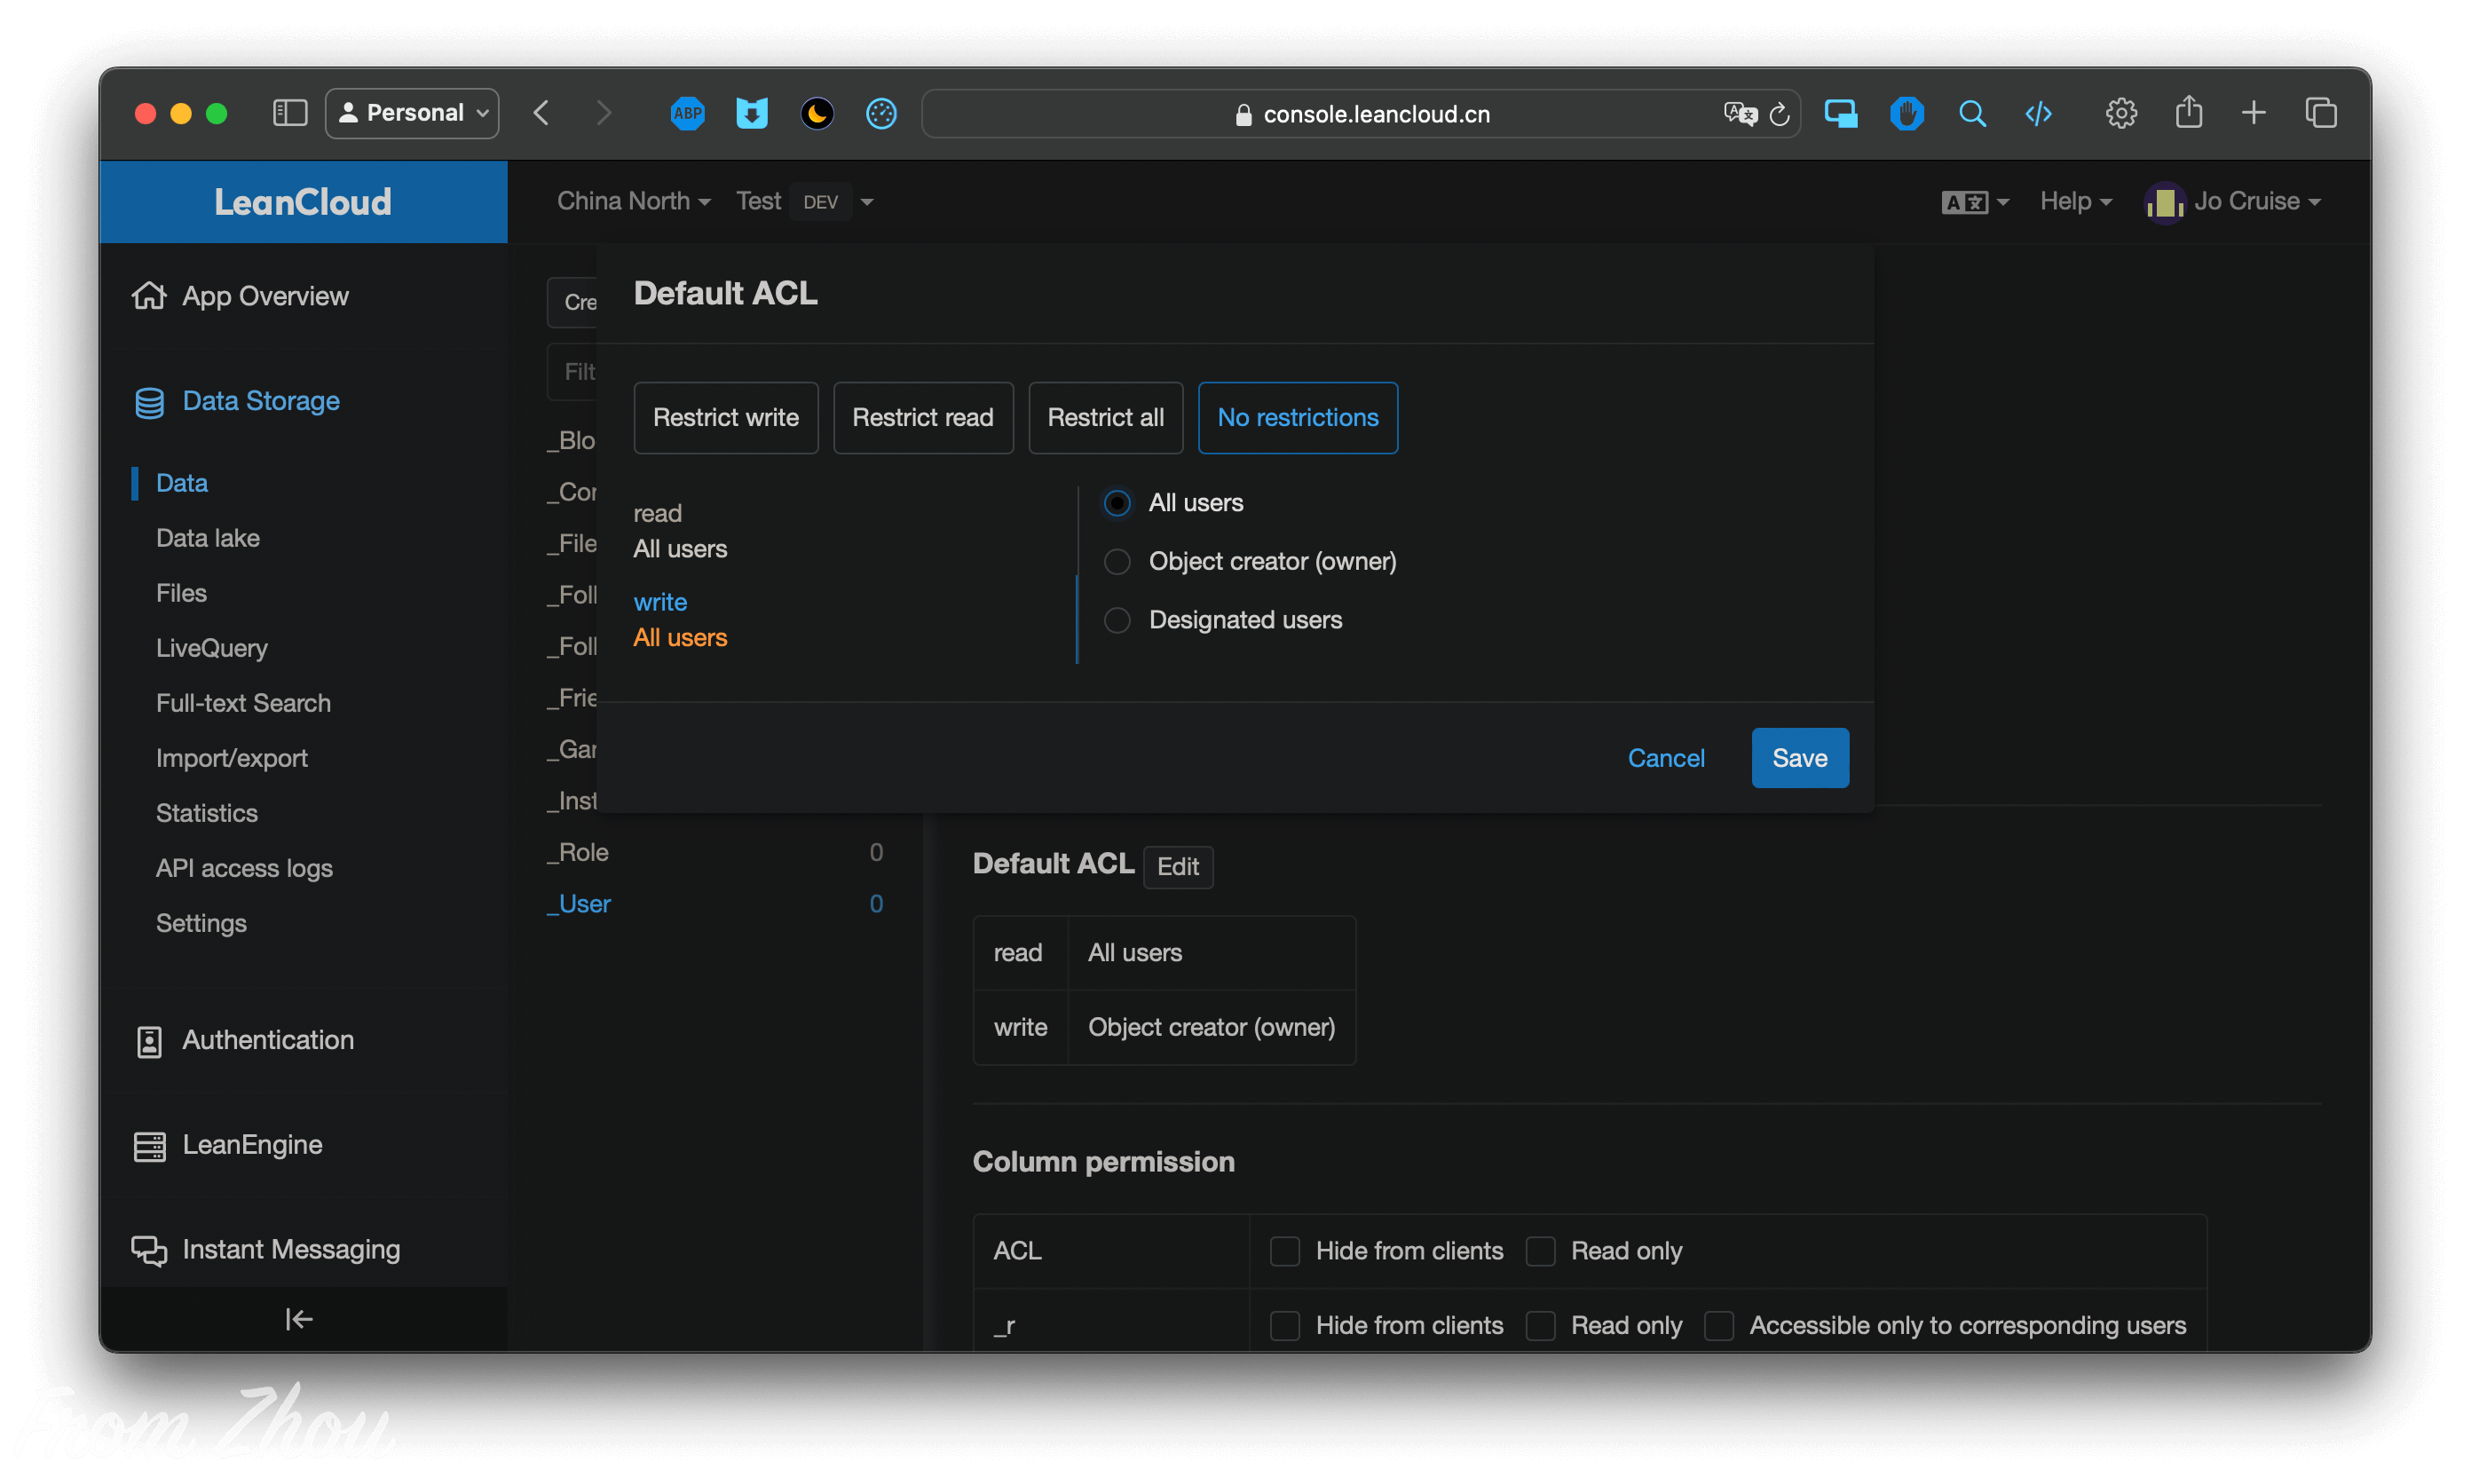
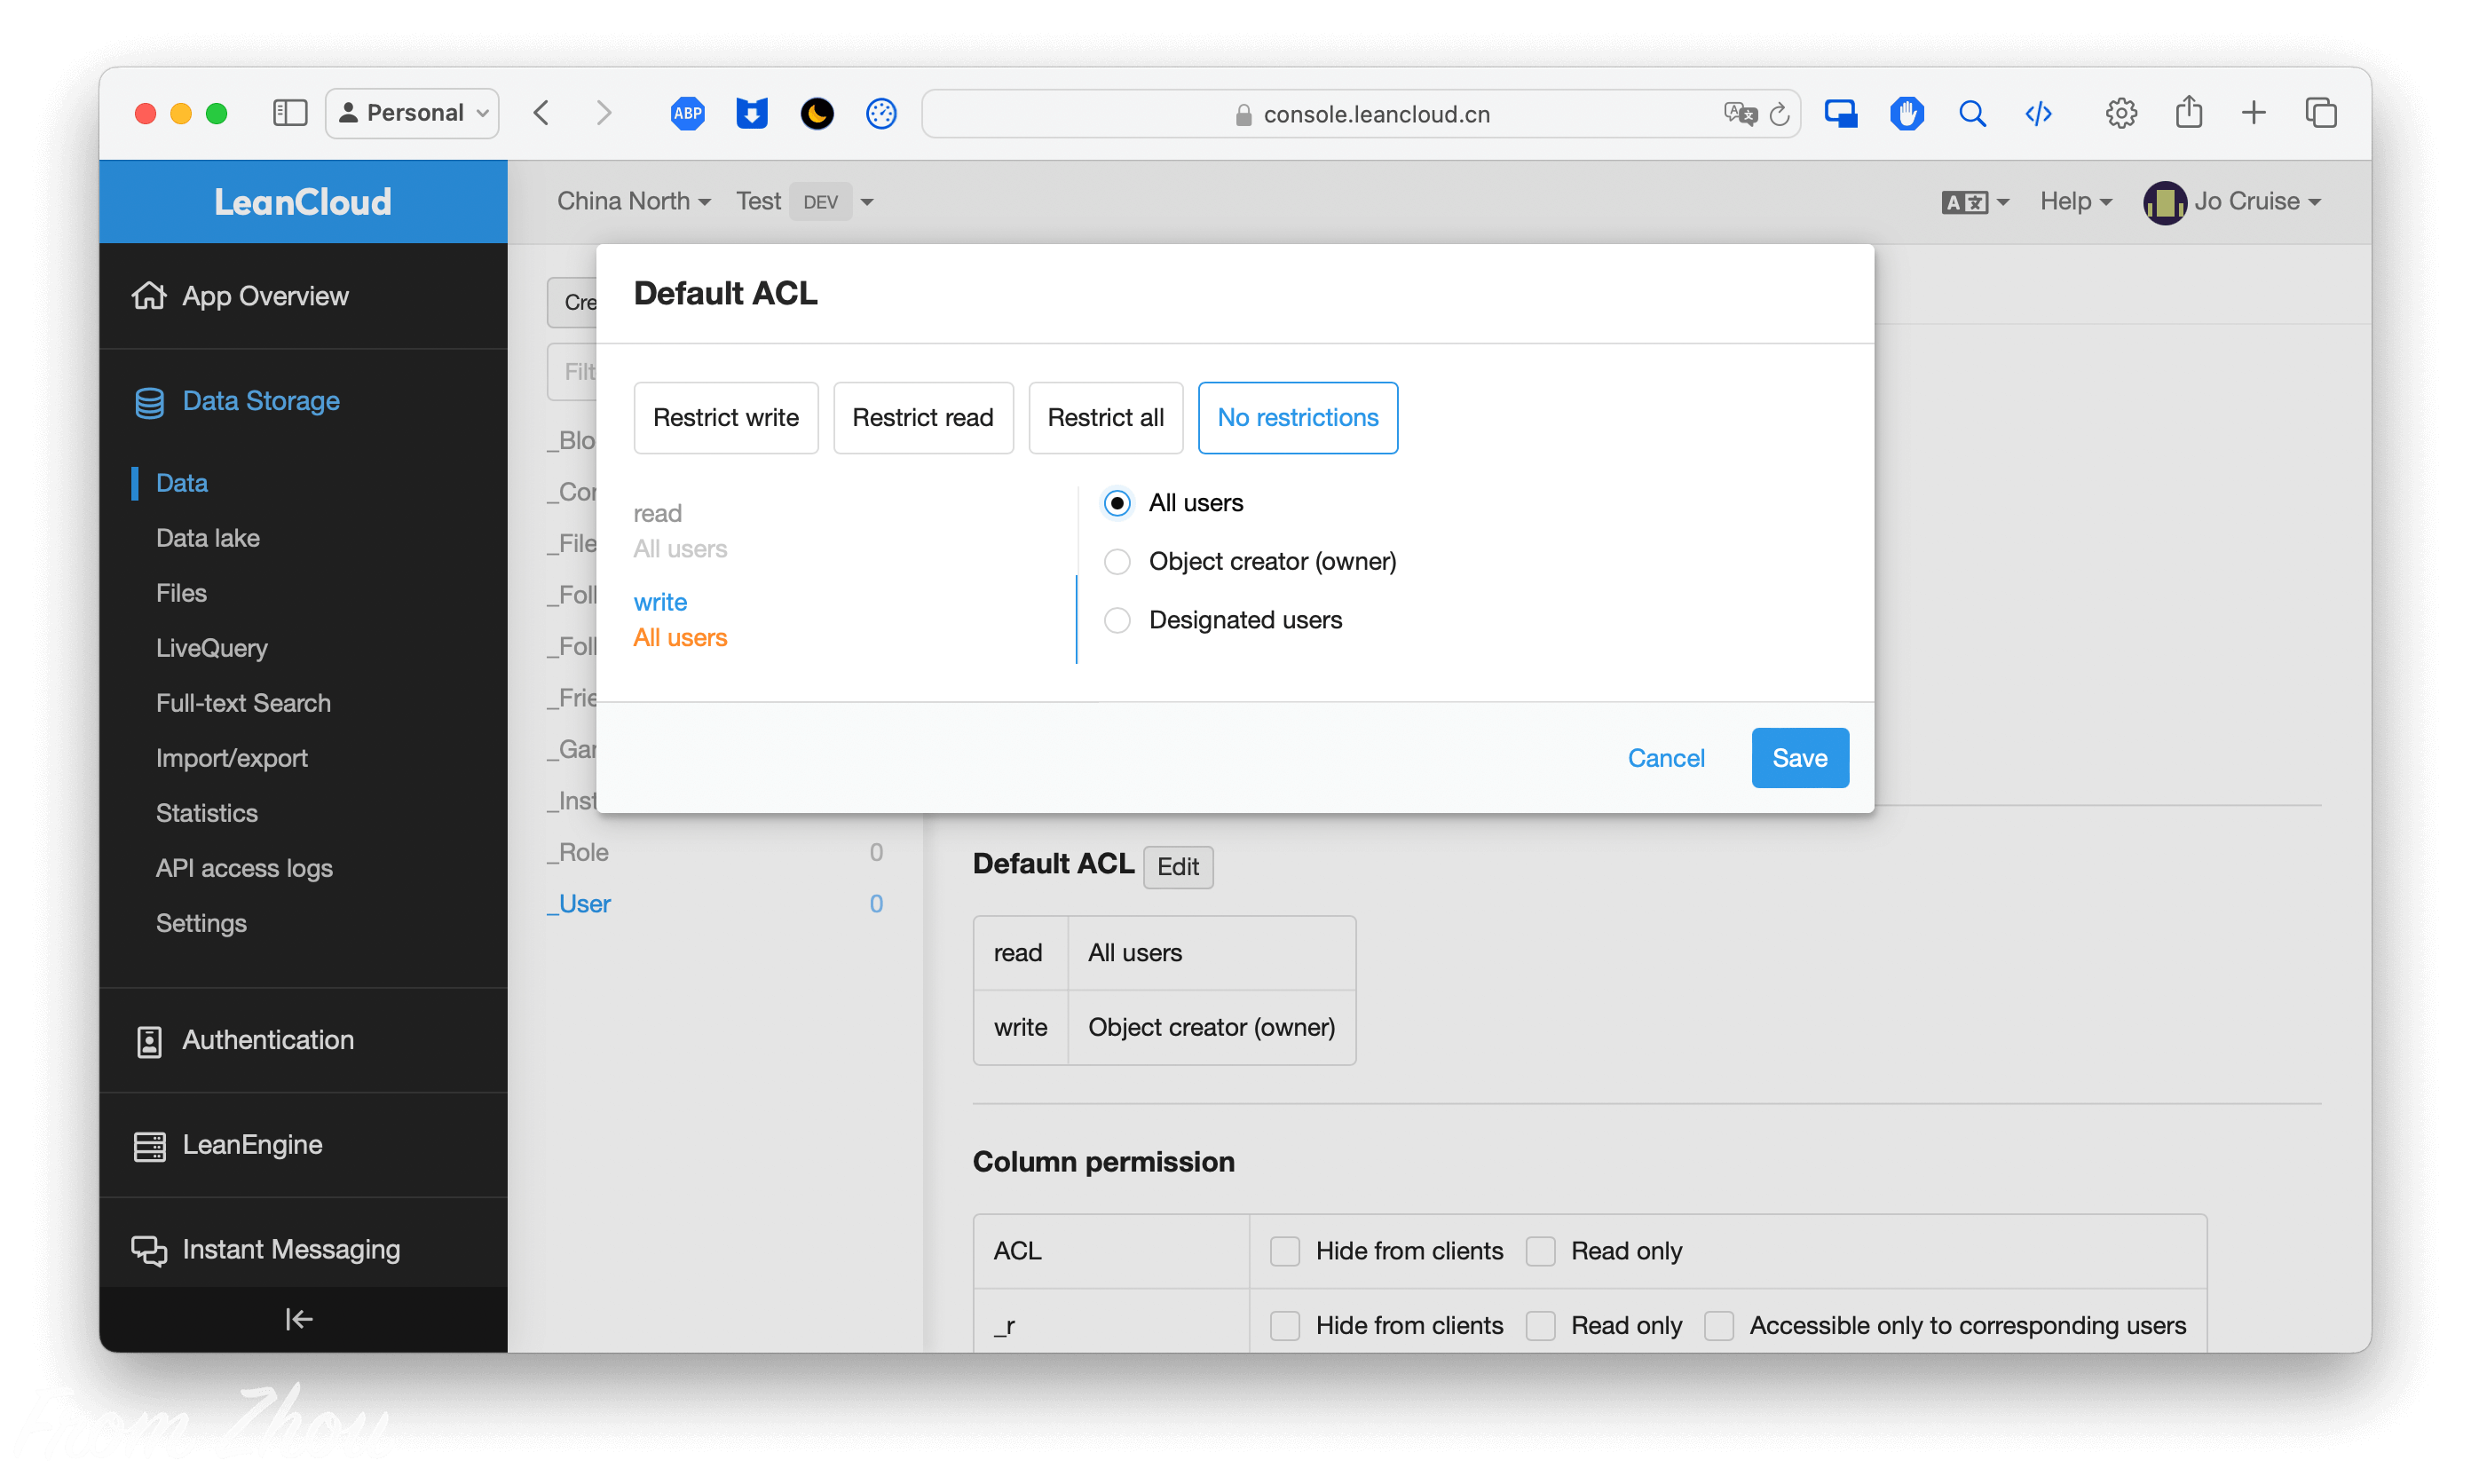
为了使登录的用户能够更改头像和昵称,请在上方的”Permission”-“Default ACL”-Edit将读写权限改为”All users”
邮箱注册权限
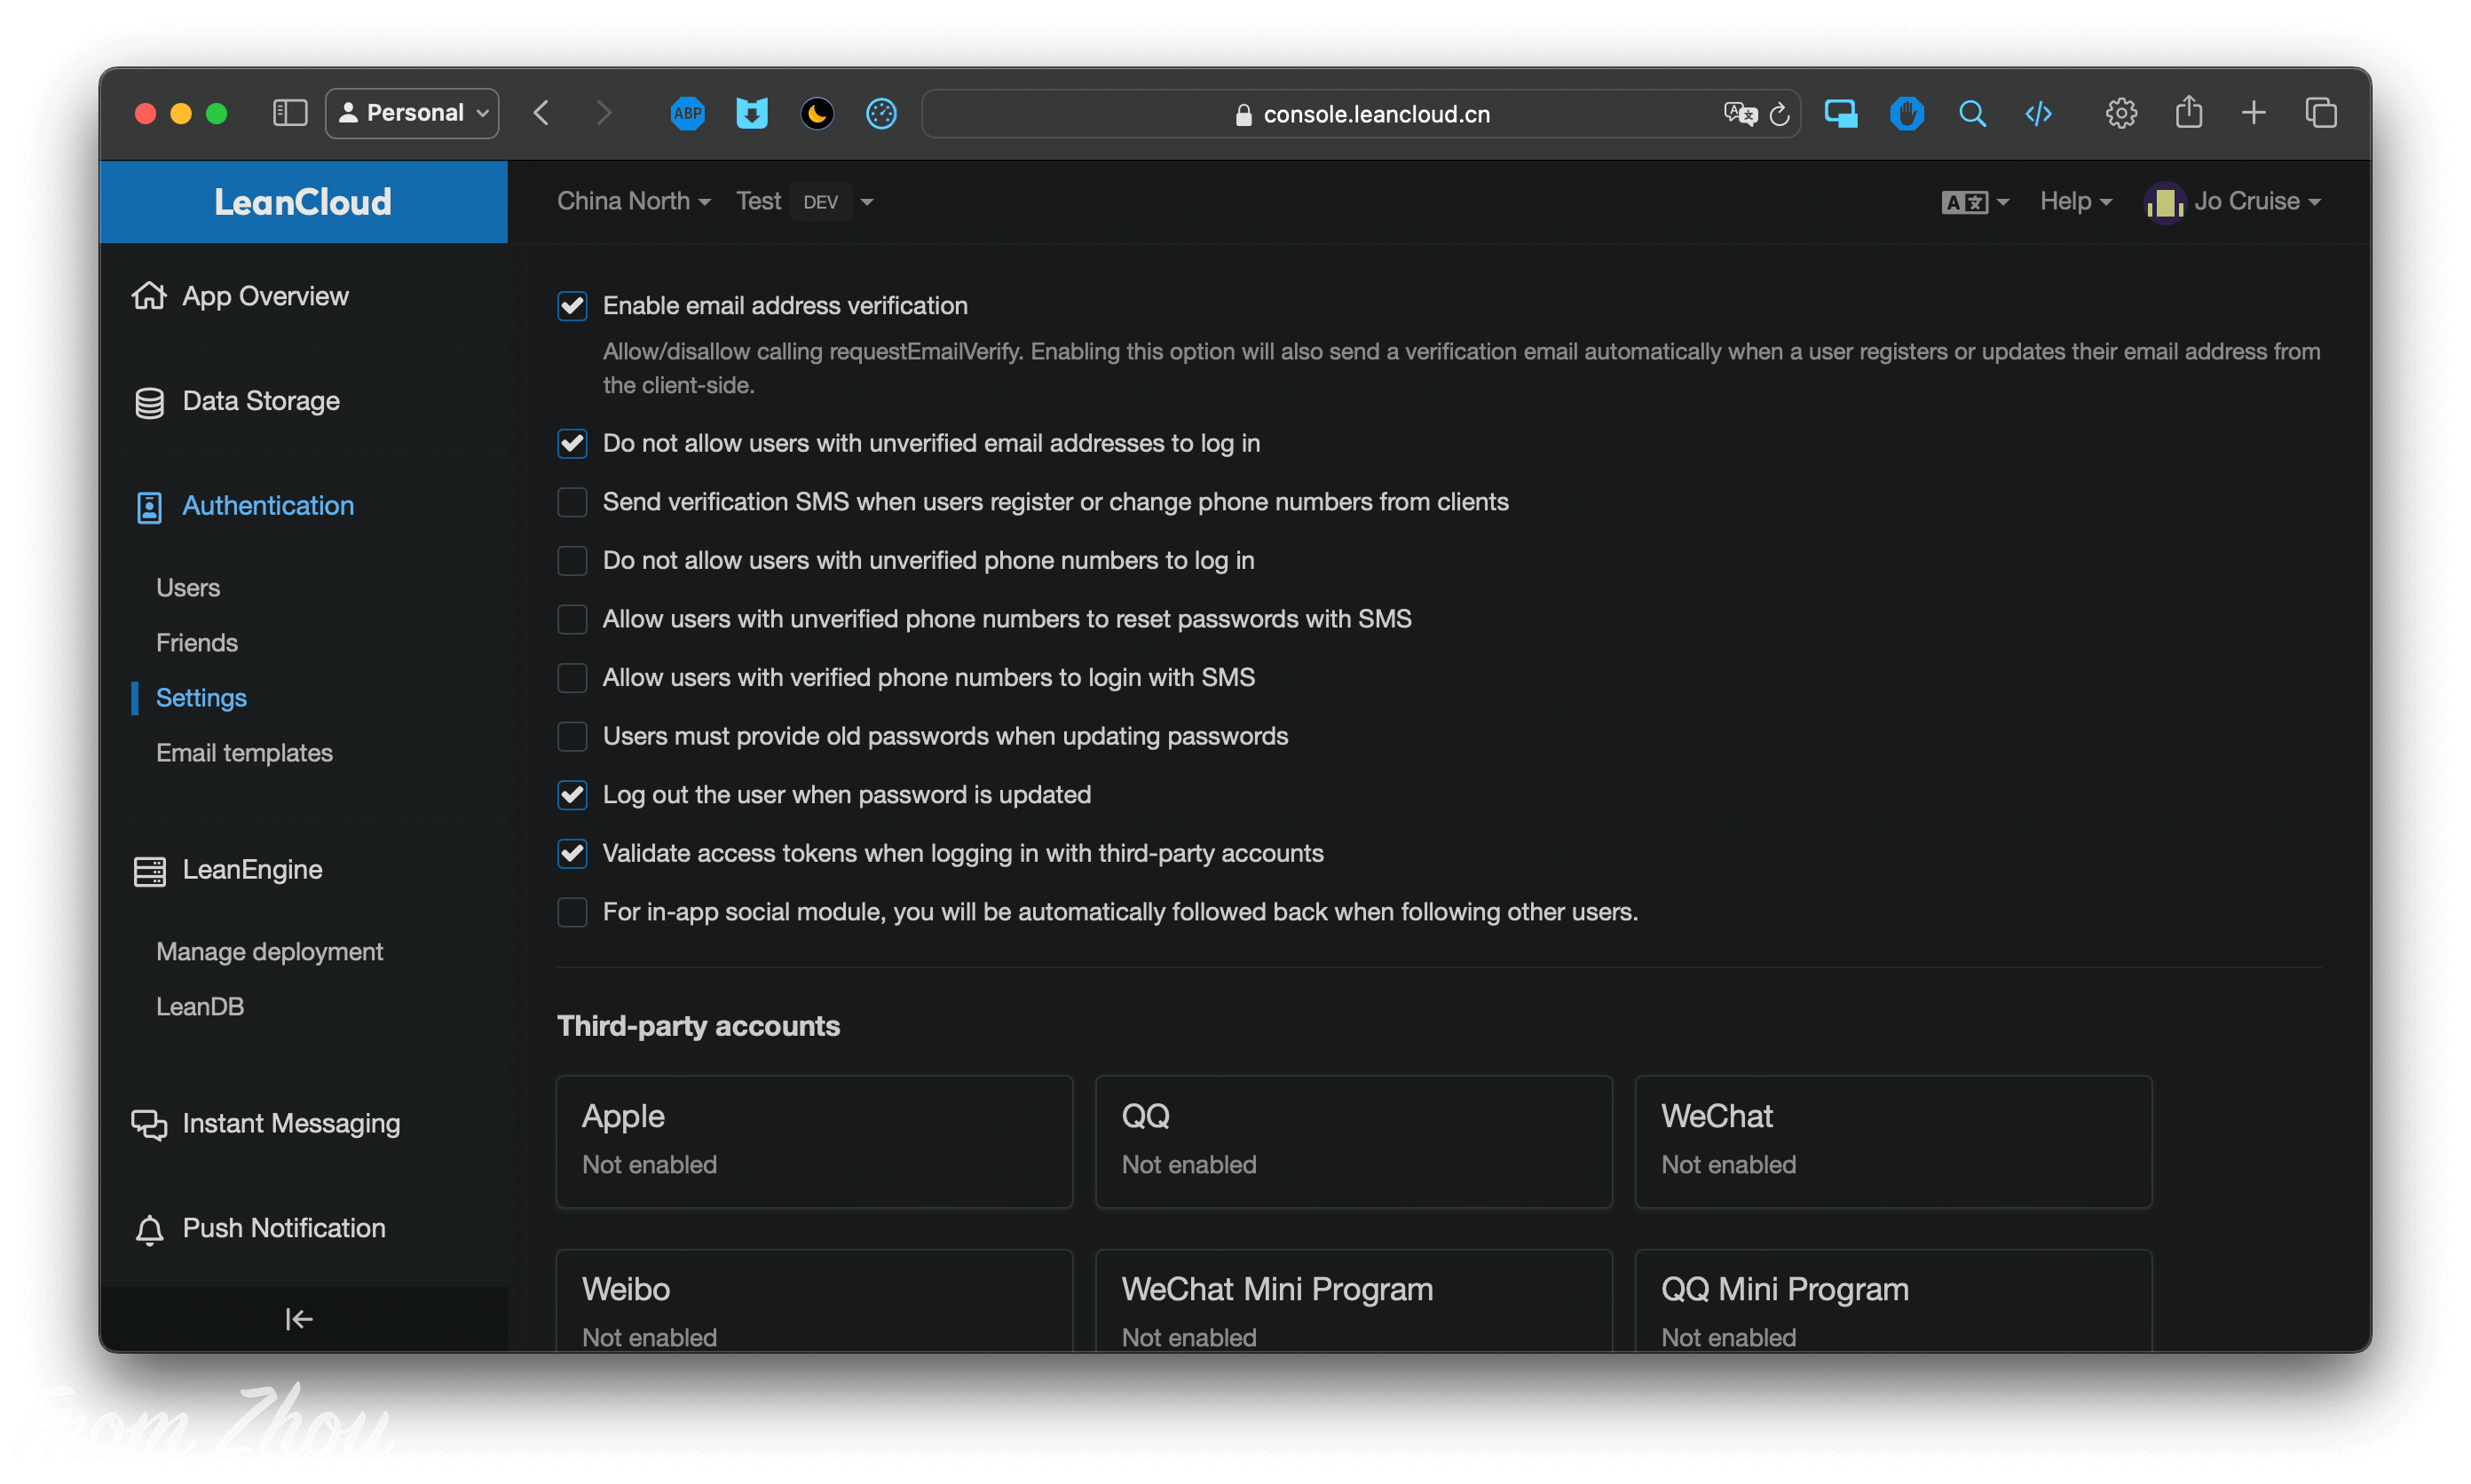
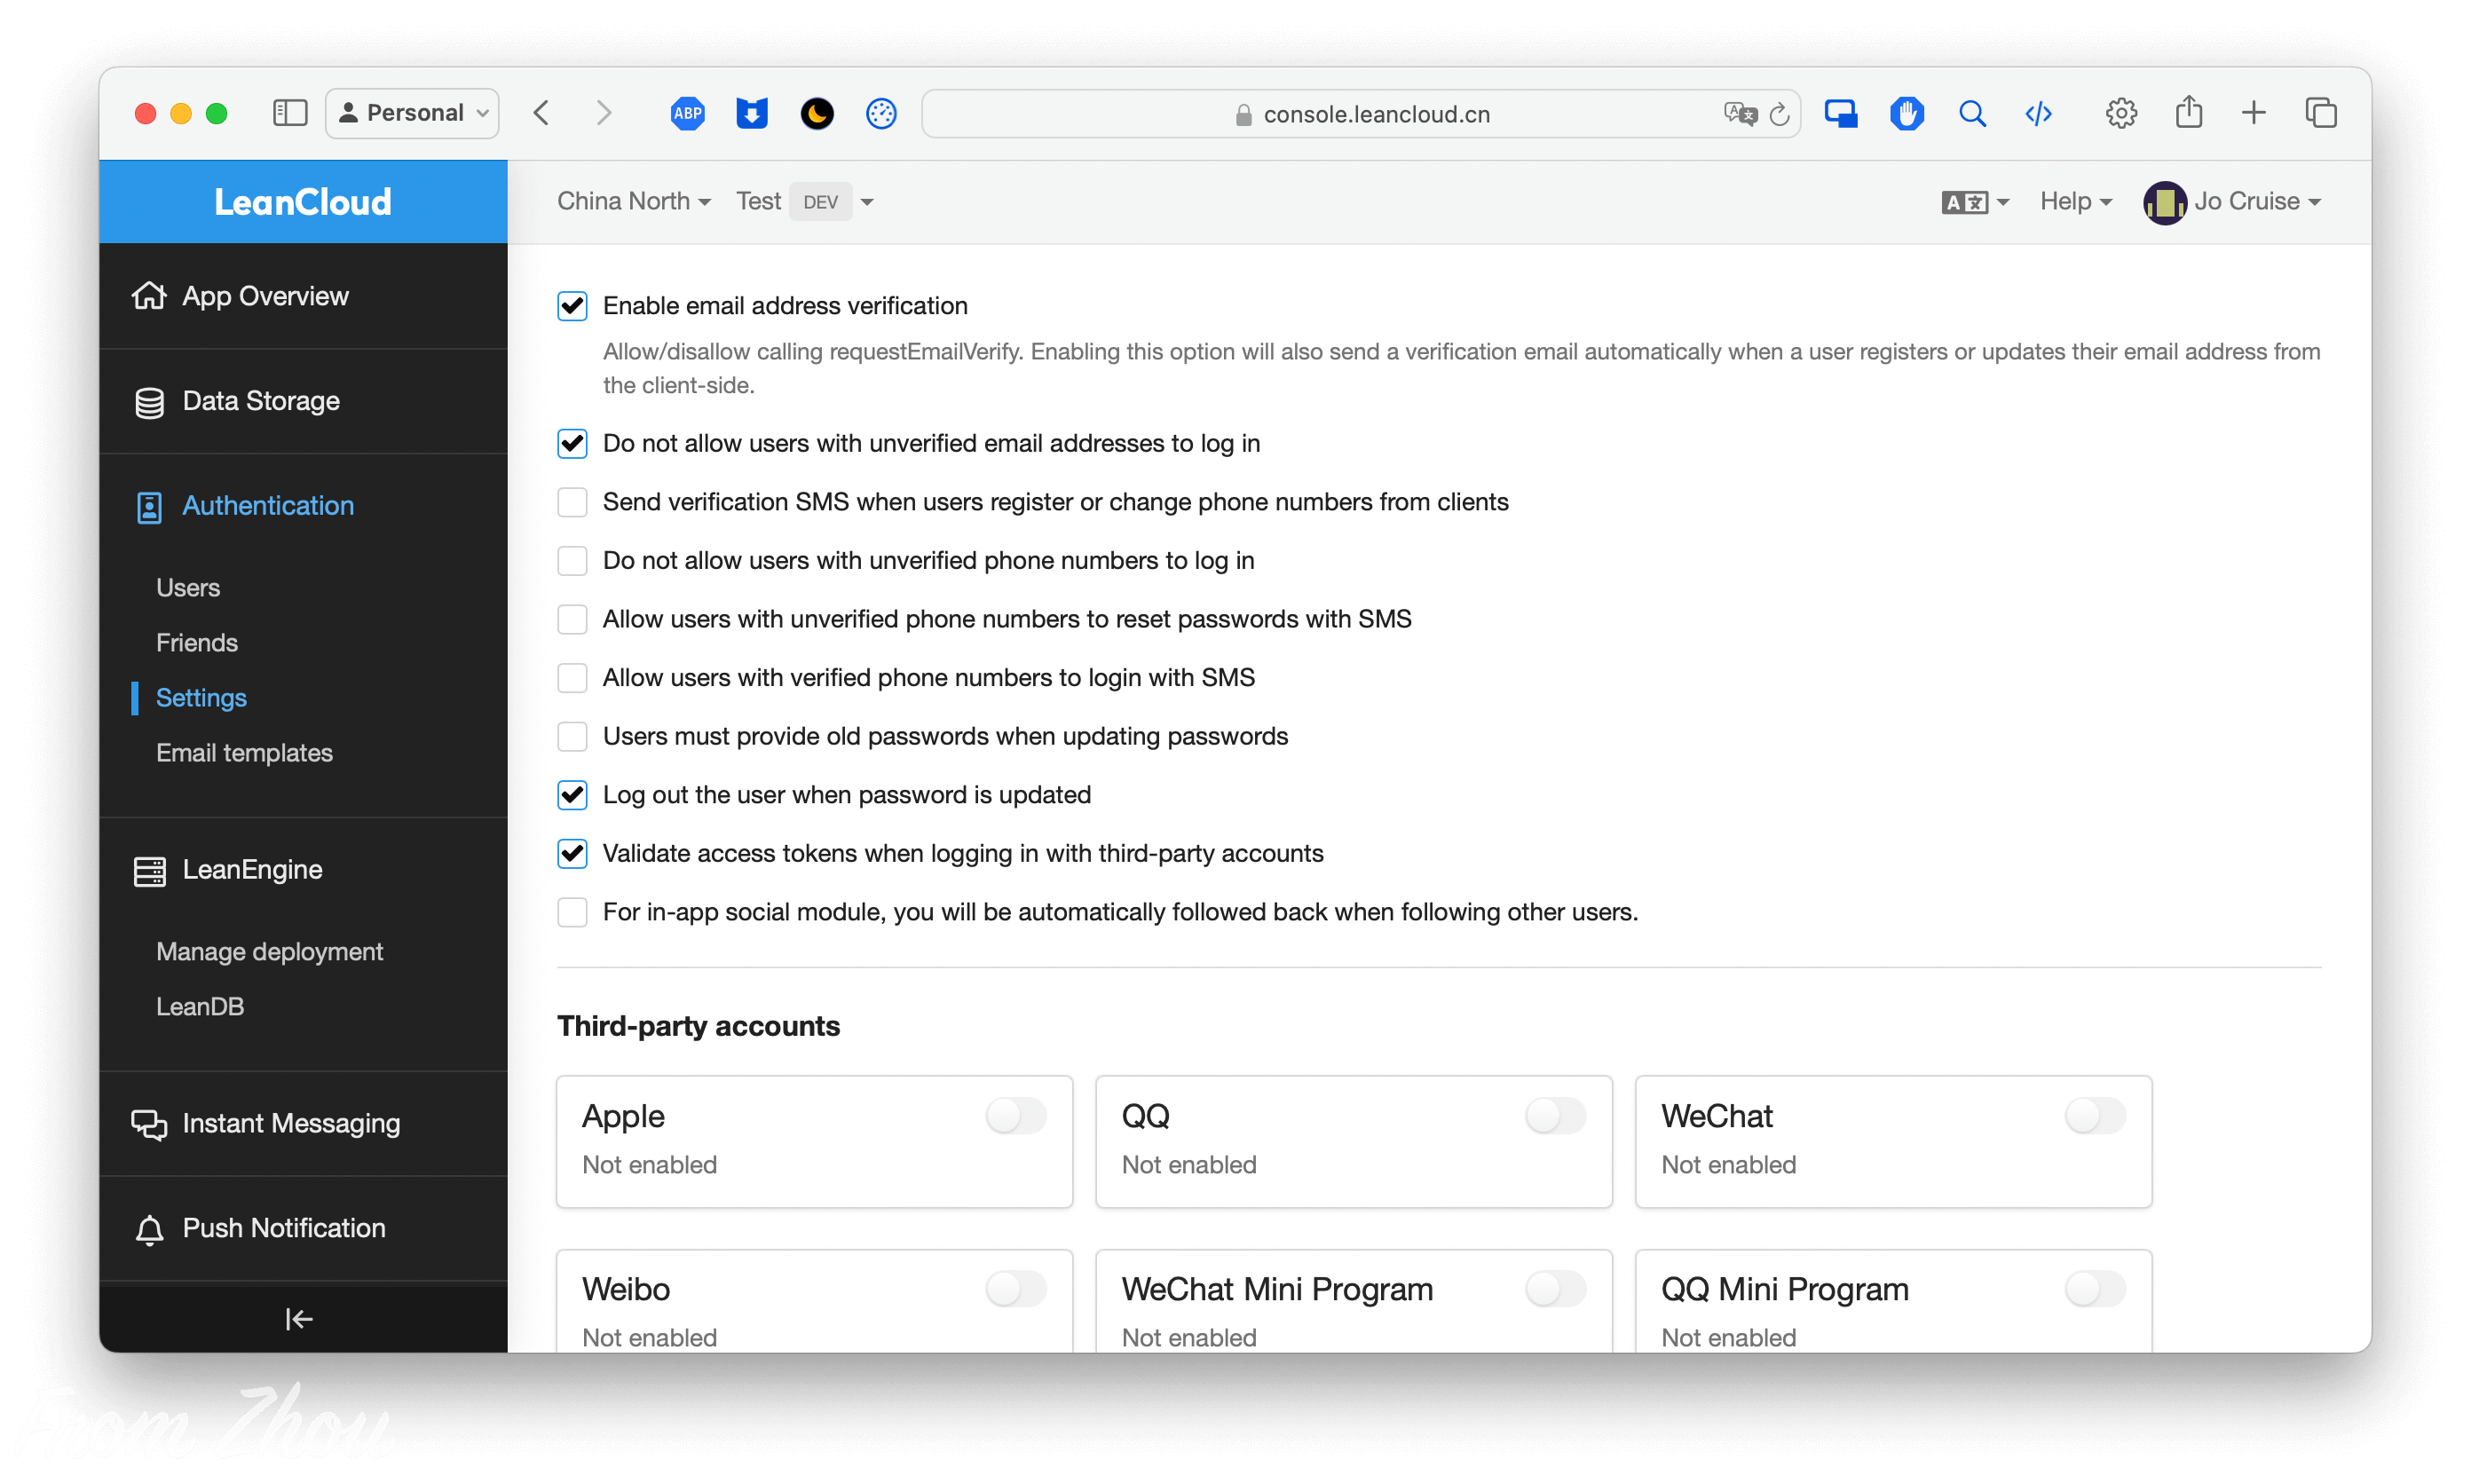
为了便使用邮箱更改密码和防止恶意注册,请在”Authentication”-“Settings”(可能需要向下滚动)中将前两个属性打勾
Enable email address verification
Do not allow users with unverified email addresses to log in
登录测试
现在登录您自定义的网址:https://username.github.io/unpublished-posts-enhancement,如果运行正确您会被redirect到https://username.github.io/unpublished-posts-enhancement/login。现在尝试注册一个账号,需要填写用户名、密码、邮箱。进行邮箱验证后就可以正常登录了。
再到Leancloud下的”Data Storage”-“Data”-“_User”,您就可以看到已注册的用户信息了。
由于Leancloud的安全限制,您无法查看任何人的密码
登录后的使用
基础使用
如果以上步骤您都顺利通过,那么您现在可以像使用原本的Chirpy主题的博客一样来对当前项目进行更改。
在提交时请注意仓库名称是否选取正确
进阶使用
请确保您有html相关知识,并且您有足够的信心来更新这个项目中的代码。
_includes
1
2
3
4
5
.
├── _includes
│   └── loader.html
│   └── login-check.html
│   └── sidebar.html
loader.html是有关加载等待动画的代码,相关的scss已经写在”_sass”-“addon”-“loader.scss”login-check.html是有关检查用户是否登录的代码sidebar.html在原作者Chirpy的代码基础上将侧边栏进行了修改
guest-Avatar
1
2
3
4
.
├── _assets
│   └── config
│   	└── guest-avatar.jpg
guest-avatar.jpg存放默认用户头像,如果进行更改,请仍命名为guest-avatar.jpg,否则要到”_config.yml”中修改头像路径
login and forgot
1
2
3
4
5
.
├── login
│   └── index.html
│   └── forgot
│   	└── index.html
1
2
3
4
.
├── _layouts
│   └── login.html
│   └── forgot.html
- 修改有关login和forgot相关代码请到第二个目录结构下
升级版本
在 unpublished-posts-enhancement 3.0.0 版本后您可以在Gemfile中进行升级。
1
2
- gem "jekyll-theme-chirpy-customized-upe", "~> 1.0.0"
+ gem "jekyll-theme-chirpy-customized-upe", "~> 3.0.0"
然后在根目录运行
1
bundle update jekyll-theme-chirpy-customizd-upe
如果您的主题为”jekyll-theme-chirpy”,请更改为”jekyll-theme-chirpy-customized-upe”,并写入版本号
请勿使用 3.0.0 以前的版本,因为版本可能不存在或存在bug,具体版本号见仓库jekyll-theme-chirpy-customized-upe的release部分
最后
该文章详细地指导您如何使用unpublished-posts-enhancement,如果您遇到任何困难可以到评论区进行留言或使用邮件等通讯方式与我取得联系。如果您觉得我的项目还不错的话不要忘记给我一个star😉
