StateBootcamp
In this chapter, we’ll discuss the state property wrapper, which is one of the most important and powerful aspects of SwiftUI. By using the state property wrapper, we can indicate to the view that it should monitor changes to a specific variable and update accordingly. For example, if we want to change the background color of a screen while it’s open, we can use the state property wrapper on the color variable, ensuring that the view updates whenever the variable changes. State property wrappers are extensively used in SwiftUI and will be featured in most of the upcoming chapters in this course. Therefore, it’s crucial to understand how to manage and utilize state effectively.
Initialize screen layout
This will involve using a ZStack with a red background layer and a VStack for the foreground content. Inside the VStack. Inside the ZStack, we’ll include a VStack with a spacing of 20. This VStack will serve as the foreground layer and house our content.
1
2
3
4
5
6
7
8
9
10
11
12
13
struct StateBootcamp: View {
  var body : some View {
    Zstack {
      // background
      Color.red
      		.ignoresSafeArea()

      // content
      VStack(spacing: 20) {
      }
    }
  }
}
Within the VStack, we’ll add a title using the Text view, and below that, a text label displaying the word “Count” followed by a colon and the number one.
Next, let’s add an HStack within the VStack. We’ll set the spacing of the HStack to 20, and within the HStack, we’ll add two buttons. For the first button’s title, let’s use the string protocol approach and set it as “Button One.” Leave the action blank for now. Similarly, for the second button, set the title as “Button Two” and leave the action blank.
To format the elements, we’ll make the title font bigger using font.title, give the count font a headline style, and underline it using .underline. We want all the elements in this stack to be white, including the buttons. Instead of individually setting the foreground color for each element, we can set it for the entire VStack by adding foregroundColor(.white) at the bottom of the stack.
1
2
3
4
5
6
7
8
9
10
11
12
13
14
15
16
17
18
19
20
21
22
23
24
25
26
27
struct StateBootcamp: View {
  var body: some View {
    Zstack {
      // background
      Color.red
      		.ignoreSafeArea()

      // content
      VStack(spacing: 20) {
        Text("Title")
        	.font(.title)
        Text("Count: 1")
        	.font(.headline)
        	.underline()
        HStack (spacing: 20) {
          Button("BUTTON 1") {

          }
          Button("BUTTON 2") {

          }
        }
      }
      .forgroundColor(.white)
    }
  }
}
Using states
Now, let’s move on to states. Start by extracting the color.red value into a variable outside the body. Create a new variable named backgroundColor of type Color and set it to Color.green for now. Copy this backgroundColor variable and paste it in place of the color.red value.
1
2
3
4
5
6
7
8
9
10
11
12
13
14
15
16
17
18
19
20
21
22
23
24
25
26
27
28
29
30
struct StateBootcamp: View {

  let backgroundColor: Color.green

  var body: some View {
    Zstack {
      // background
      backgroundColor
      		.ignoreSafeArea()

      // content
      VStack(spacing: 20) {
        Text("Title")
        	.font(.title)
        Text("Count: 1")
        	.font(.headline)
        	.underline()
        HStack (spacing: 20) {
          Button("BUTTON 1") {

          }
          Button("BUTTON 2") {

          }
        }
      }
      .forgroundColor(.white)
    }
  }
}
Instead of directly specifying a color in the code, we are now referencing a variable. When we click “Resume,” we can see the green background. We want to change the background color when we click the buttons, so we need to indicate that the variable can change. In SwiftUI, we use the @State property wrapper to achieve this. By adding @State before the variable declaration, we inform the view that it should monitor the state of that variable and update accordingly.
Let’s start changing the background color. For “BUTTON 1,” set backgroundColor to .red, and for “BUTTON 2,” set it to .purple. Now, when you click “BUTTON 1,” the background color turns red, and when you click “BUTTON 2,” it turns purple. The @State property wrapper can be applied to any variable that might change in the view.
1
2
3
4
5
6
7
8
9
10
11
12
13
14
15
16
17
18
19
20
21
22
23
24
25
26
27
28
29
30
struct StateBootcamp: View {

  let backgroundColor: Color.green

  var body: some View {
    Zstack {
      // background
      backgroundColor
      		.ignoreSafeArea()

      // content
      VStack(spacing: 20) {
        Text("Title")
        	.font(.title)
        Text("Count: 1")
        	.font(.headline)
        	.underline()
        HStack (spacing: 20) {
          Button("BUTTON 1") {
            backgroundColor = .red
          }
          Button("BUTTON 2") {
            backgroundColor = .purple
          }
        }
      }
      .forgroundColor(.white)
    }
  }
}
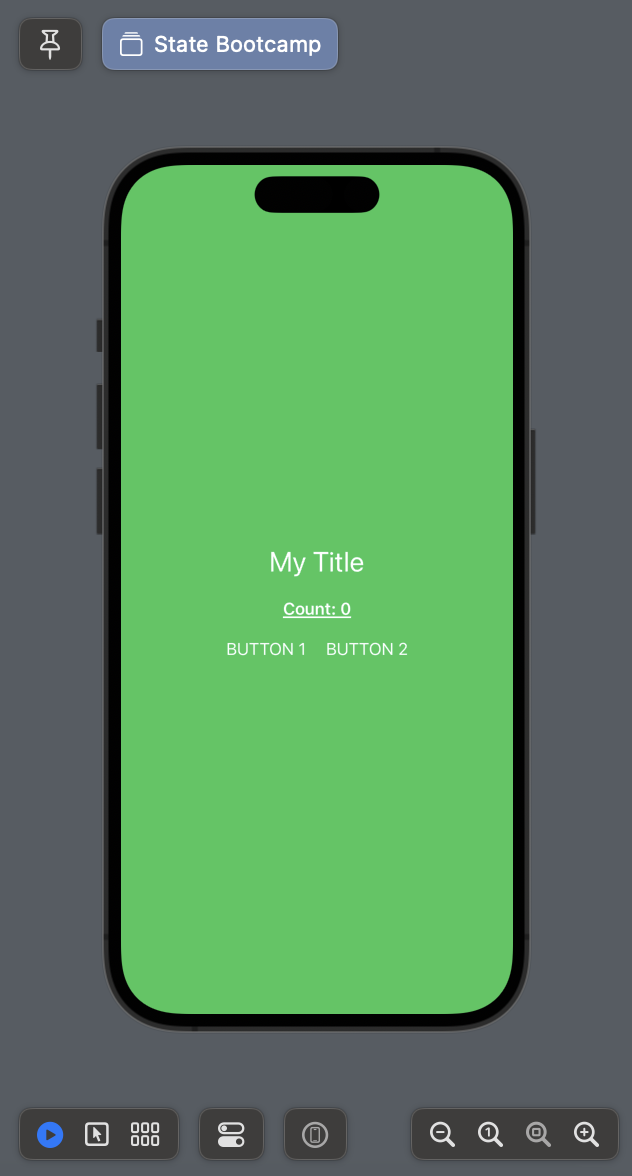
To demonstrate further, let’s extract the title as well. Add @State var myTitle: String = "My Title" to hold the title variable. We can then reference myTitle in the text view. Modify the button actions to assign different values to myTitle, such as “Button One was pressed” and “Button Two was pressed.”
Now, let’s add another variable called count of type Int and set it to zero using @State var count: Int = 0. Within the text view, replace the number one with \(count) to reference the variable within the string. In the button actions, increment the count by one using count += 1 for “BUTTON 1,” and decrement it by one using count -= 1 for “BUTTON 2.”
1
2
3
4
5
6
7
8
9
10
11
12
13
14
15
16
17
18
19
20
21
22
23
24
25
26
27
28
29
30
31
32
33
34
35
struct StateBootcamp: View {

    @State var backgroundColor : Color = Color.green
    @State var myTitle : String = "My Title"
    @State var count: Int = 0
    var body: some View {
        ZStack{
            //background
            backgroundColor
                .ignoresSafeArea()
            VStack(spacing: 20) {
                Text(myTitle)
                    .font(.title)
                Text("Count: \(count)")
                    .font(.headline)
                    .underline()

                HStack(spacing: 20) {
                    Button("BUTTON 1") {
                        backgroundColor = .red
                        myTitle = "Button 1 was pressed"
                        count += 1
                    }
                    Button("BUTTON 2") {
                        backgroundColor = .purple
                        myTitle = "Button 2 was pressed"
                        count -= 1

                    }
                }
            }
            .foregroundColor(.white)
        }
    }
}
In summary, every time we click “Button Two,” the count variable will be decremented by one. Clicking “Button One” will increment the count. When we click “Resume” and then “Button One” repeatedly, we can see the count continuously increasing. The view updates because it is monitoring the state of the variable and reflecting the changes accordingly. Similarly, when we click “Button Two,” the count decreases.
This chapter introduces the concept of state variables and demonstrates how to change them. We can extract variables, such as the title or colors, and modify them using the state property wrapper. By doing so, the view will be aware of the potential changes and update accordingly.
Source code
1
2
3
4
5
6
7
8
9
10
11
12
13
14
15
16
17
18
19
20
21
22
23
24
25
26
27
28
29
30
31
32
33
34
35
36
37
38
39
40
41
42
43
import SwiftUI

struct StateBootcamp: View {

    @State var backgroundColor : Color = Color.green
    @State var myTitle : String = "My Title"
    @State var count: Int = 0
    var body: some View {
        ZStack{
            //background
            backgroundColor
                .ignoresSafeArea()
            VStack(spacing: 20) {
                Text(myTitle)
                    .font(.title)
                Text("Count: \(count)")
                    .font(.headline)
                    .underline()

                HStack(spacing: 20) {
                    Button("BUTTON 1") {
                        backgroundColor = .red
                        myTitle = "Button 1 was pressed"
                        count += 1
                    }
                    Button("BUTTON 2") {
                        backgroundColor = .purple
                        myTitle = "Button 2 was pressed"
                        count -= 1

                    }
                }
            }
            .foregroundColor(.white)
        }
    }
}

struct StateBootcamp_Previews: PreviewProvider {
    static var previews: some View {
        StateBootcamp()
    }
}